PFS Vision
Contents
[PFS] Vision v1.2
The [PFS] Vision system is a tool to increase your immersion while enforcing some view effect on your side, you will be able to:
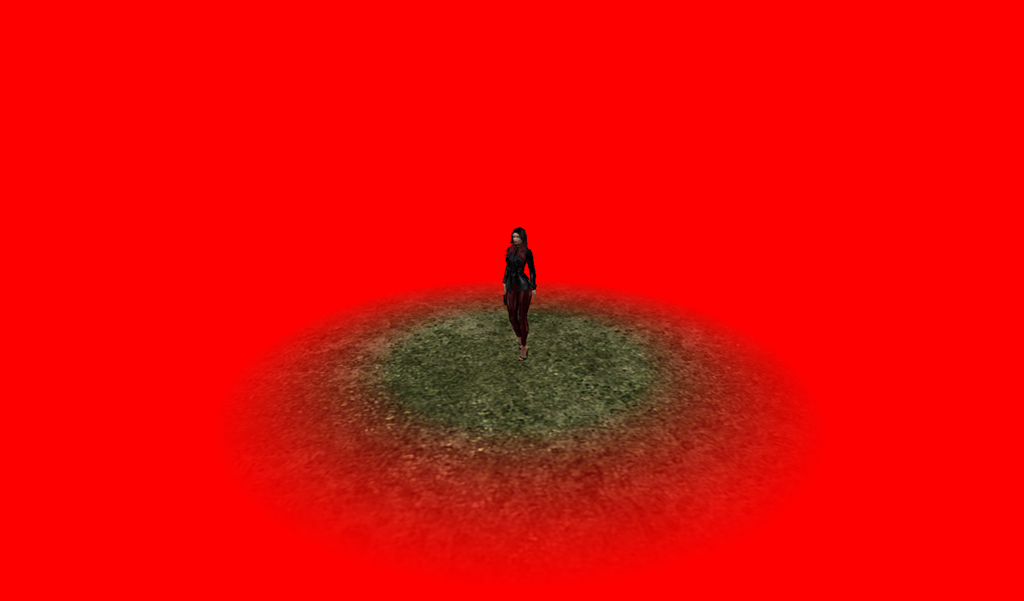
- Blind using the sphere view technology to limit the view distance
- Change others avatars into a simple silhouette past a distance
- Replace the world textures by an unique one
- Block the camera inside the sphere view
- Hide the location
- Block the start IM within a distance (RLVa only)
- Display the keyholder position and rotation on a radar
- Add an mask overlay (RLVa) or a mask HUD (RLV) with differents forms
- Adjust the transparency of the mask
- Adjust the main color of the mask (RLVa only)
- Lock the environnement with EEP settings
- Force the mouselook view
- lock the camera position
- limit the camera mouvement within a range
- focus the camera to look at a certain part of your keyholder
- Sync [PFS] Vision users with same settings
- Save/load paraset of settings
WARNING: Some people can be more sensitive to some visual effect which can trigger motion sickness or other type of seizures. use it wisely and respects people safewording!
With Vision 1.2 you can now sync several users using the HUD. One setting change on one user can be automatically duplicated on all others users listed on the HUD.
With Vision 1.2 you can now save and load paraset in your HUD to restore a bunch of settings in one click. If sync is enabled the loaded paraset will be applied on all listed users.
With Vision 1.2 you can watch in-world where the user is looking from and where the user looking at.
With Vision 1.2 you can adjust the access level to public, private, group, owner or PFS.
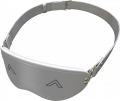
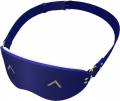
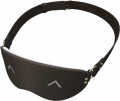
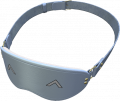
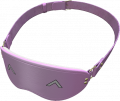
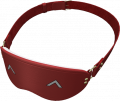
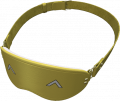
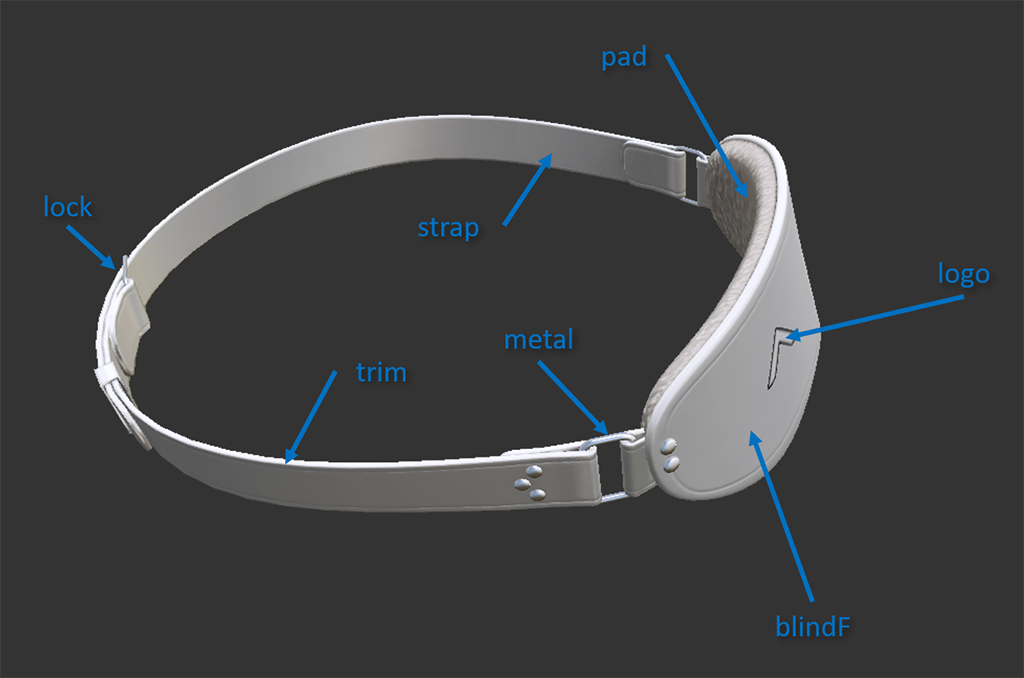
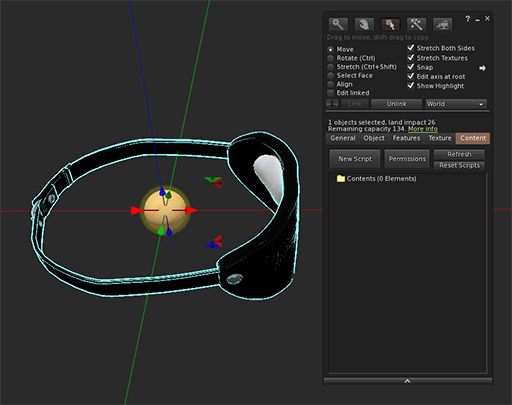
With Vision v1.1 you have now a not rigged blindfold very easy to adjust with 2 prims only. Make it look like plastic or leather, display overhead status or not, add a face logo or not, colorize it as you wish, [PFS] Vision include a menu where you or your keayholder can set everything wihout the need of an additional HUD!
With Vision v1.1 you can use the hide/show plugin to convert any of your blindfold, hood or whatever to a compatible device with [PFS] Vision! see chapter 4.3
1. Generalities
This object has been scripted in an unique way to make it flexible, versatile, accessible, modifiable and robust.
1.1 RLV
As a viewer standard, RLV restrictions are filtered to the object UUID and if your object uses same restrictions for several functions, you may run into trouble and the result may look a way different than expected. Thay's why RLV, here, is managed to the script level. You can have several scripts triggering restrictions w/o any interactions between them. You can easily follows the object restrictions table from the RLV menu.
Both RLV and RLVa are supported here but for some special features like screen overlay an addition attachement is required for RLV users. Even if most of us uses RLVa viewers today we still need to make things compatible to previous standards.
1.2 Access
The menu access is build in an inovative way. As standard, everyone can access the menu, with different access levels. Access levels are:
- public
- private
- group
- owner
- PFS
- keyholder
- selftouch
Depending on the lock state of the object, you may get different access levels (they are cumulable) which allows you to do things or not. The not allowed functions are strikethrough but the positive side is you can still read every parameter and setting, including the user.
The menu is mono user but the keyholder has always the priority to access it.
You can access it using the command line over channel 7, just hit /7##vision to get access to the main menu of the object. Replace ## with the user 2 first letters of the user name.
The use of the API allows you to override the actual keyholder, this will help you to implement your own access list from wherever you want. You can implement "key grabbing" scripts as much you want they are asked one after the other. For more info look at the included public access script "plug.access.public".
1.3 Configurable
The object include a "config" notecard that allows you to modify it to your wishes. In our case here you can for example adds your own mask textures or your own world textures. There is no limitation except the script linkset data memory (128Kb). For the world texture we prefer image file w/o alpha values.
1.4 API
Objects you cannot mod are no fun, that why you will find here an integrated API that will allows you to interact yourself with the object. Firstly created to manage the key grabbing for PFS, it is now documented and available to create for example: access plugins, interaction with other objects to enforce mask and world textures or your own HUD. More will come depending on the people and affiliate creators requests. To keep it easy and accessible to everyone the API works over JSON string shared on linked message channel 99.
1.5 Integrated help
To make is accessible and easy to use, the object menus have a "help" feature to stream in your chat window some general informations regarding the actual menu displayed to help you to understand what does every buttons.
1.6 Truekey
The only way to unlock the object is the use of the key held by the keyholder. In case you are stuck or the keyholder not showing back you can, if seted up previously, use the Truekey feature to get unlocked by everyone having the key password. You can access it, set it up and use it fromt he "Tools" menu.
2. Vision features
2.1 HUD
[PFS] Vision is locked
A mask is covering the display
A sphere is limitating the view
The camera is focused to look at the keyholder
All the world textures are overwritten
you can reduce the HUD when not in radar mode
2.2 HUD radar mode
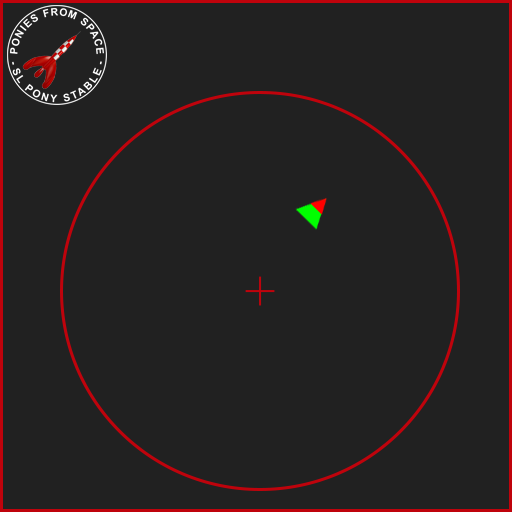
The radar mode is available from the "blind" menu. It helps the user to find the keyholder when blinded. the ![]() represents the user position and
represents the user position and ![]() represents the keyholder position with the red triangle giving the direction where the keyholder is looking at.
represents the keyholder position with the red triangle giving the direction where the keyholder is looking at.
The range of the radar is 40m with a logarithmic scale to give a better positionning when coming closer to the keyholder. This is particularly usefull for those enjoying activities like Silent blinded dressage.
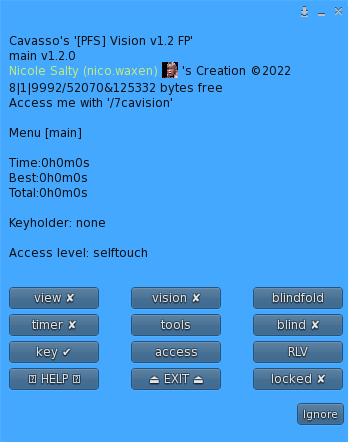
The main menu provides you an access to all the functions. You can access it if you touch me or use the command line in the of 5m range. Command line is on channel 7 and is built with the 2 first letters of the username followed by the type of the gear: vision here... Example for 'nikki resident' vision you will type /7nivision (you will be noticed if the user has a customized prefix). You can also replace the prefix with '*' to get all users menus. Keyholder are not concerned by the distance limit but take in account the talk range limit.
⍰ HELP ⍰ – Streams the help into the chat window.
⏏ EXIT ⏏ – Close the actual menu and release the menu access to anyone. If not, the access menu will timeout after 300s of no use. Keyholder always have the priority to access the menu even if used by someone else. The actual menu user will be noticed for any attempt to access the menu (fail or success).
locked ✔ – Vision is locked, you cannot detach it anymore.
key ✔ – the key is available and anyone can grab it.
tools – sub menu for truekey, HUD controller...
RLV – sub menu for RLV specifics features (if they are).
timer – sub menu for RL/SL timer.
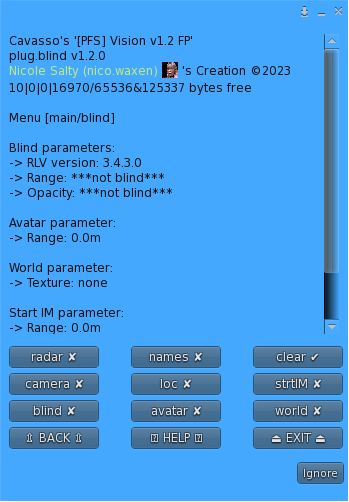
blind – sub menu for all the blind functions like sphere, avatar, world texture, camera lock, location, start IM and radar.
view – sub menu for all the view functions like mask, transparency, color and environnement.
vision – sub menu for all the vision functions like mouselook, camera lock, camera limit and focus.
blindfold – sub menu to adjust the blindfold options (only appear if the blindfold is worn).
⇫ BACK ⇫ – Move back to the previous menu.
⍰ HELP ⍰ – Streams the help into the chat window.
⏏ EXIT ⏏ – Close the actual menu and release the menu access to anyone.
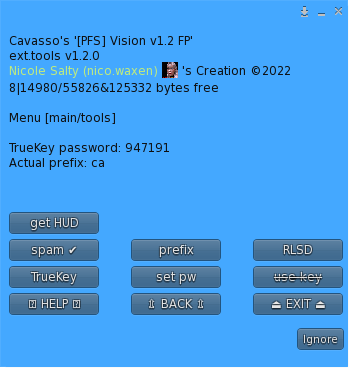
TrueKey – Get a new TrueKey.
set pw – set a new password number.
use key – use your TrueKey to grab the key.
spam ✔ – local chat spam for RLV version and the fact you own this awesome tool.
prefix – change your prefix to whatever you want as long it's build with 2 letters.
RLSD – Reset Link Set Data, best way to reset your object including the non-volatile linkset data.
get HUD – get the HUD to control this [PFS] Vision.
⇫ BACK ⇫ – Move back to the previous menu.
⍰ HELP ⍰ – Streams the help into the chat window.
⏏ EXIT ⏏ – Close the actual menu and release the menu access to anyone.
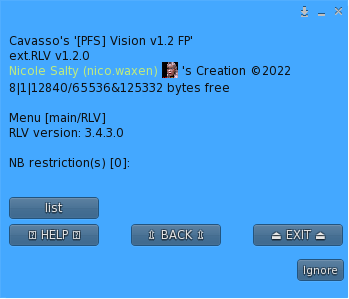
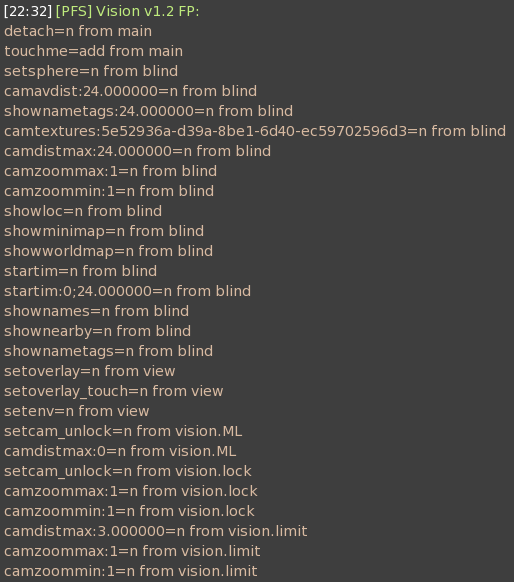
list – Stream in your chat window all the active restrictions with the script name which is the source of the restriction. You may see same restriction for different scripts, this is all normal.
Example of streamed out list of active restrictions:
NOTE: When the timer runs out, the key is given back to the user. No one will be able to grab it except if they are some "key grabbing" plugin scripts installed.
⇫ BACK ⇫ – Move back to the previous menu.
⇦ PREVIOUS - Move back to the previous page.
NEXT ⇨ - Move forward to the next page.
⍰ HELP ⍰ – Streams the help into the chat window.
stop – Stop the actual timer but don't give back the key to the user.
RLtime ✘ – SL time mode or the so called online timer.
RLtime ✔ – RL time mode.
hide ✔ – The actual timer value and the added time triggered by the menu vuttons are hided to the user.
+2min, +5min, +30min, +1h, +3h, +6h, +12h, +24h – Adds the respecting time to the actual timer value.
⇫ BACK ⇫ – Move back to the previous menu.
⍰ HELP ⍰ – Streams the help into the chat window.
⏏ EXIT ⏏ – Close the actual menu and release the menu access to anyone.
blind ✘/✔ – Access the sub-menu to change the blind settings. ‘✘’ no blind setting active, ‘✔’ at least one blind setting is active.
avatar ✔ – Turn all the avatars to silhouettes beyond a certain distance. If ‘blind’ is ‘✔’ the distance is set to the sphere distance, if ‘blind’ is ‘✘’ a menu will ask you the distance you want to set.
NOTE: With Firestorm 6.6.3.67470 the avatars may just vanish from the screen! nice avatar eraser feature. With Kokua 6.6.3.52925 the body vanish but some attachement stay more or less visible like haire, freaking!
world ✘/✔ – Access the sub-menu to change the in-world texture. ‘✘’ no world setting active, ‘✔’ the user’s world is textured.
camera ✔ – Prevent moving the camera too far from the avatar. If ‘blind’ is ‘✔’ the distance is set to the sphere distance, if ‘blind’ is ‘✘’ a menu will ask you the distance you want to set.
loc ✔ – The user is unable to know where they are: the world map is hidden, the parcel and region name on the top menubar are hidden, they cannot create landmarks, nor buy land, nor see what land they have left after teleport, nor see the location in the About box, and even system and object messages are ofuscated if they contain the name of the region and/or the name of the parcel. In addition the user is unable to view the mini map and world map.
strtIM ✔ – User can only start IM sessions with people that are within a certain distance. If ‘blind’ is ‘✔’ the distance is set to the sphere distance, if ‘blind’ is ‘✘’ a menu will ask you the distance you want to set. RLV doesn’t support the distance modifier.
radar ✔ – The user's HUD is now a radar to show position and looking direction of the keyholder. The range is 40m and the scale is logarithmic.
names ✔ – Unable to see name and they are replaced by dummies, tooltips are hidden and pie menu is almost useless so user can't get the profile, etc... nametags are not displayed anymore, nearby window is useless.
clear ✔ – Reset all blind settings back to default values. ✔means the settings are on default values.
⇫ BACK ⇫ – Move back to the previous menu.
⍰ HELP ⍰ – Streams the help into the chat window.
⏏ EXIT ⏏ – Close the actual menu and release the menu access to anyone.
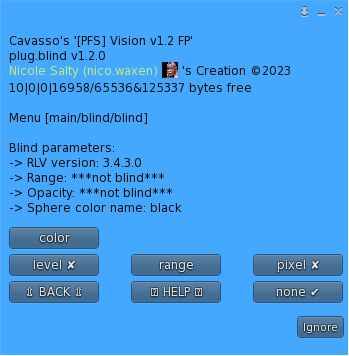
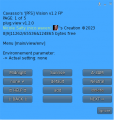
none ✔ – Blind level to none, defaults values for mode, color and opacity are set.
level ✘ – no sphere view ▁ - 16m ▂ - 8m ▃ - 4m ▆ – 2m ▇ - 1m ▉ - 0.5m. You can only level up, to remove the actual sphere view, one has to step up all levels until coming back to the start or hit 'none' button.
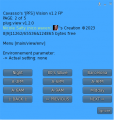
range ✔ – A customized sphere size has been set. Value between 0.0m and 255.0m, under 0.3m you can consider being fully blind.
pixel ✔ – The colored sphere is replaced by a pixelisation effect depending on the 'blind" setting (only RLVa).
color – Sub-menu to change the sphere color.
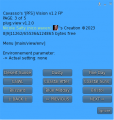
You can change the sphere color to adjust it to your liking, in addition you can also make the color cycling.
⇫ BACK ⇫ – Move back to the previous menu.
⇦ PREVIOUS - Move back to the previous page.
NEXT ⇨ - Move forward to the next page.
⍰ HELP ⍰ – Streams the help into the chat window.
D.green, F.pink, L.red, L,yellow, P.pink, amethyst, azure, black, blood, blue, copper, custom.A, custom.B, gold, indigo,lime, metal, navy, orange, plum, purple, red, silver, slate, steel, white, yellow – Select the color preset for the sphere.
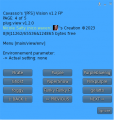
RGB.A, RGB.B – Enter the new value for custom.A or custom.B color. Example <123/123/123>
cycle ✘ – No color cycling.
cycle ✔ – Sphere color is cycling to randoms values. Every defined time a new color is randomly selected and the sphere change to the next value with gradient.
time – Enter a new cycle time for color change.
⇫ BACK ⇫ – Move back to the previous menu.
⍰ HELP ⍰ – Streams the help into the chat window.
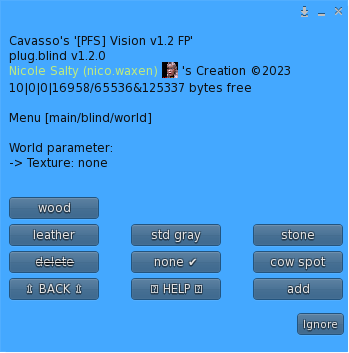
add – add a custom world texture to the set, format is texture UUID + name (8 chars max) no space no punctuation.
delete – remove a custom previously added world texture from the set.
std gray, cow spot, wood, stone – set the world texture with the selected texture.
⇫ BACK ⇫ – Move back to the previous menu.
⍰ HELP ⍰ – Streams the help into the chat window.
⏏ EXIT ⏏ – Close the actual menu and release the menu access to anyone.
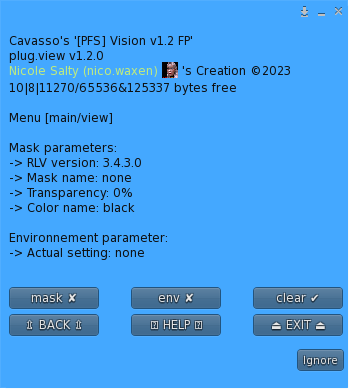
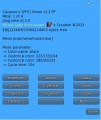
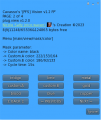
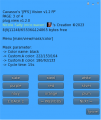
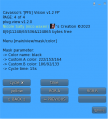
mask ✘/✔ – Access the sub-menu to change the mask settings. ‘✘’ no mask setting active, ‘✔’ at mask is actually covering the user's display.
env ✘/✔ – Access the sub-menu to change the environment settings. ‘✘’ no environment setting active, ‘✔’ at specific environment is actually active.
clear ✔ – Reset all mask & environment settings back to default values. '✔' means the settings are on default values.
⇫ BACK ⇫ – Move back to the previous menu.
⇦ PREVIOUS - Move back to the previous page.
NEXT ⇨ - Move forward to the next page.
⍰ HELP ⍰ – Streams the help into the chat window.
add – Add a custom mask to the list. Format is <texture_uuid>,<name>[,<color_name>]. Name length is limited to 8 letters and must be unique. Color is optional but the name must be one present in the internal memory.
delete – Delete a custom mask from the list if they are.
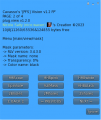
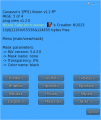
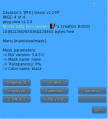
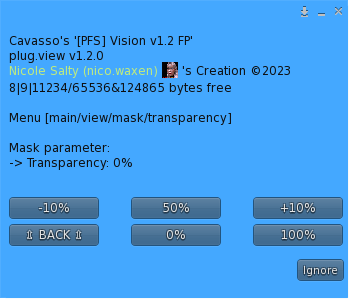
transparency – Set the transparency value of the mask.
color – Set the color of the mask.
none ✔ – Remove the actual mask from the user’s view. ✔ means there is no mask active.
list of masks… – List of available masks. The list is built from the textures present in the ‘maskenv’ notecard, and the one manually added from the menu.
List of the standard masks:
⇫ BACK ⇫ – Move back to the previous menu.
100% – the mask is fully transparent. The touch rules are still opeartive!
-10% – decrease the transparency by 10%.
50% – Set the transparency to 50%.
+10% – increase the transparency by 10%.
You can change the mask color to adjust it to your liking, in addition you can also make the color cycling.
⇫ BACK ⇫ – Move back to the previous menu.
⇦ PREVIOUS - Move back to the previous page.
NEXT ⇨ - Move forward to the next page.
⍰ HELP ⍰ – Streams the help into the chat window.
D.green, F.pink, L.red, L,yellow, P.pink, amethyst, azure, black, blood, blue, copper, custom.A, custom.B, gold, indigo,lime, metal, navy, orange, plum, purple, red, silver, slate, steel, white, yellow – Select the color preset for the mask.
RGB.A, RGB.B – Enter the new value for custom.A or custom.B color. Example <123/123/123>
cycle ✘ – No color cycling.
cycle ✔ – Mask color is cycling to randoms values. Every defined time a new color is randomly selected and the mask change to the next value with gradient.
time – Enter a new cycle time for color change.
The list of available environments presets is variable and build from the maskenv notecard and those that are manually added from the add menu.
If your settings folder is not populated with environnement settings, the final result may differ depending on the viewer you are using! Best copy all the sets from your Librairy\Environnements\Skies\ to your Inventory\settings\.
⇫ BACK ⇫ – Move back to the previous menu.
⇦ PREVIOUS - Move back to the previous page.
NEXT ⇨ - Move forward to the next page.
⍰ HELP ⍰ – Streams the help into the chat window.
add - Add a custom environnement setting to the set, format is name (8 chars max) no space no punctuation. In case of EEP be sure the setting is present in the user inventory, see folder 'settings'.
delete - Remove a custom environment setting from the list if they are.
none ✔ - No environnement preset active.
default, Neutral, Midnight, Sunrise, A-3AM, A-6AM, A-9AM, Midday, A-3PM, A-6PM, A-9PM, Night,80's Wave, Barcelona, Blizzard, Blue Midday, Bristol, CalWL, Coastal Afternoon, Coastal Sunset, Desert Sunset, Dusty, Fine Day, foggy, Funky Funky Funky, gelatto,Ghost, PaperSnow, Pinkpurple, Pirate, Purple, Purplebluenight, Verdigris, ShadowSet - The user is unable to change the viewer environment settings and is forced to one of the listed. Preset can be EEP settings if the user folders are previously setup.
Examples of environment settings.
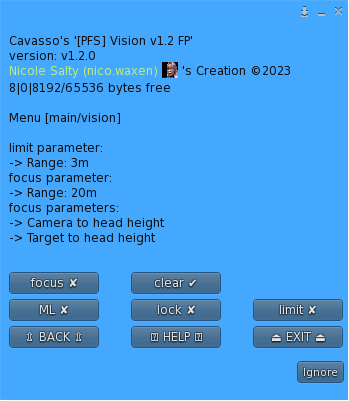
From this menu you can apply some vision restrictions.
⇫ BACK ⇫ – Move back to the previous menu.
⍰ HELP ⍰ – Streams the help into the chat window.
⏏ EXIT ⏏ – Close the actual menu and release the menu access to anyone.
ML ✔ - Mouselook is enabled and the user's camera is forced to the first-view.
lock ✔ - prevents the user from unlocking the camera from the avatar, meaning that the user cannot use Alt to focus nor orbit the camera around the avatar. While the camera is locked, the sim forces it to stay in a line of sight from the avatar.
limit ✘/✔ - access the sub-menu to change the camera limit. ‘✘’ no camera limit is active, ‘✔’ user has a camera limit restriction.
focus ✘/✔ - access the sub-menu to force the camera focus. ‘✘’ no focus is active, ‘✔’ user's caemra is forced to lookat the keyholder, click for options.
clear ✔ - Reset all blind settings back to default values. '✔' means the settings are on default values..
⇫ BACK ⇫ – Move back to the previous menu.
⍰ HELP ⍰ – Streams the help into the chat window.
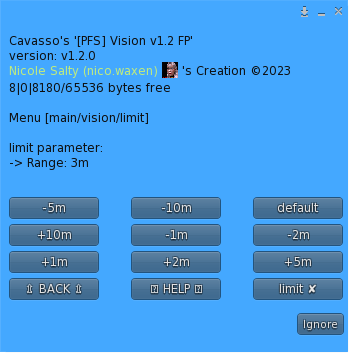
limit ✔ - prevents the user from moving the camera outside the defined range from the avatar, either with the mouse wheel or when focusing with the Alt key.
+1m, +2m, +5m, +10m – increase the camera limit range of the selected value, maximum is 96m.
-1m, -2m, -5m, -10m – decrease the camera limit range of the selected value, minimum is 1m.
default – set the camera limit range to the default value of 3m.
⇫ BACK ⇫ – Move back to the previous menu.
⇦ PREVIOUS - Move back to the previous page.
NEXT ⇨ - Move forward to the next page.
focus ✔ - If the keyholder is present and inside the defined focus range, the user is forced to turn toward the keyholder and the camera will focus one of the selected target, the height of the camera can be forced with myEyes. If the user sit on an object, or the keyholder is off sim, or if the keyholder is outside the focus range, the focus is replaced by camera limit of 3.0m. Be aware that ML is not allowed, if the user decide to roll into ML position an RLV command will be triggered to force to leave ML. In case ML setting is ✔ the user will be toggled from ML to forced camera and vice versa to keep the feeling of the special experience.
+1m, +2m, +5m, +10m - increase the keyholder detection range within the user is forced to focus toward the keyholder, maximum is 96m.
-1m, -2m, -5m, -10m - decrease the keyholder detection range within the user is forced to focus toward the keyholder, minimum is 1m.
default - set the focus range to the default value of 20m.
myEyes ⇧,⇨,⇩ - Select the height of the user's camera, where the user is looking from (head, half height, feet) when focus is active.
target ⇧,⇨,⇩ - Select the height of the user's camera target, where the user is looking at (head, butt height, feet) when focus is active.
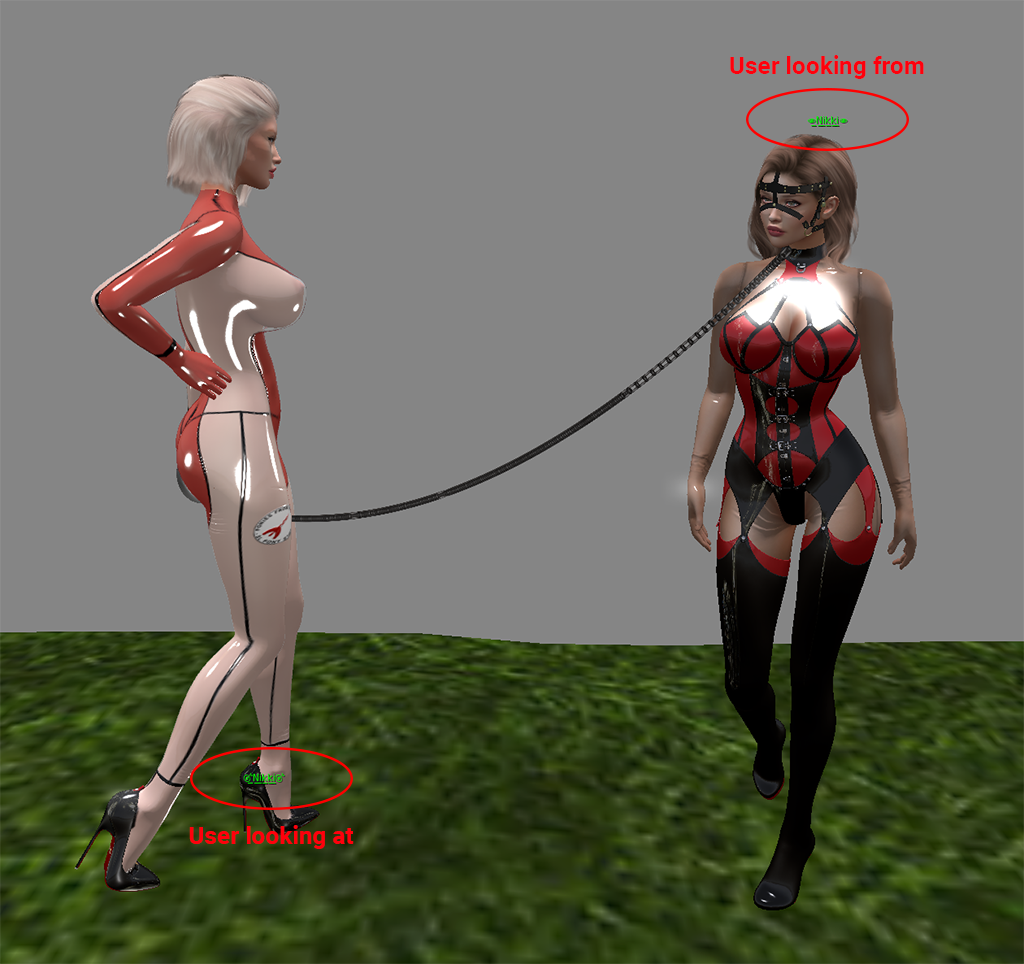
show ✔ - If the parcel allows to rez, this function shows inworld the position of the user's camera and where he is looking at. You can use it to adjust the positions of the position where the user is looking from and the position where the user is forced to look at. Disabled if the keyholder vanish or the user sit on an obkect.
Example of the show feature.
In the example here, the user is forced to look at the feet of the keyholder. Name with 🎯 is the looking at and name with 👁 is the looking from.
Examples of different focus positions settings.
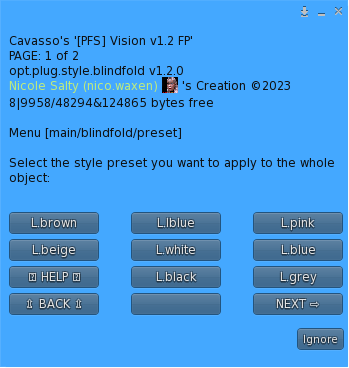
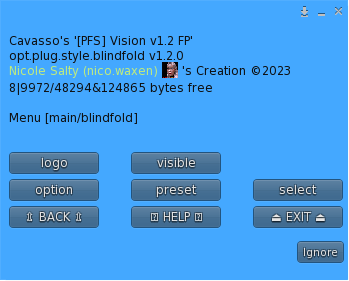
Texture & color setup is only done over the style menu by both user and keyholder. The blindfold can have a leather look or plastic look, for leather you have different sets of textures for the differents colors, for plastic you have only one texture set for the white color and you can colorize it using the color menu.
⇫ BACK ⇫ – Move back to the previous menu.
⍰ HELP ⍰ – Streams the help into the chat window.
⏏ EXIT ⏏ – Close the actual menu and release the menu access to anyone.
option - Adjust the blindfold options.
preset - Select a full preset for the entire blindfold.
select - Adjust individuals prims to the wished looking.
logo - Select the logo to show on the dedicated face.
visible - Show/hide the blindfold and the behavior with the listed states.
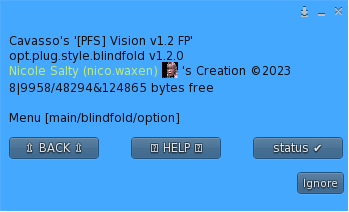
⇫ BACK ⇫ – Move back to the previous menu.
⍰ HELP ⍰ – Streams the help into the chat window.
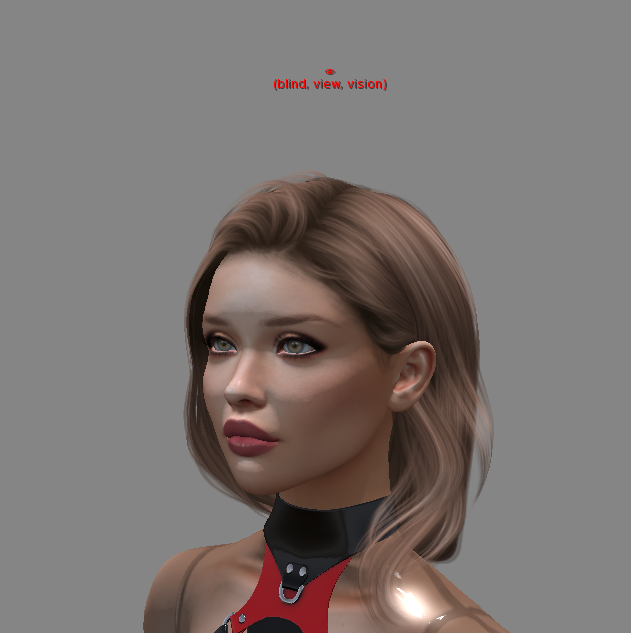
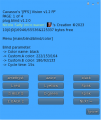
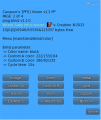
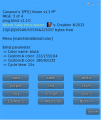
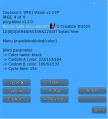
status ✔ – [PFS] Vision status is shown over the head.
Examples of the status.
⇫ BACK ⇫ – Move back to the previous menu.
⇦ PREVIOUS - Move back to the previous page.
NEXT ⇨ - Move forward to the next page.
⍰ HELP ⍰ – Streams the help into the chat window.
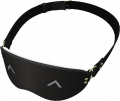
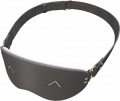
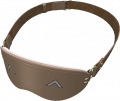
L.grey, L.beige, L.white, L.blue, L.brown, L.lblue, L.pink, L.red, L.yellow - Select one of the leather preset.
Plastic - Select the plastic preset.
NOTE: for leather texture the color is included in the texture and for the plastic texture you only have a white preset, coloring has to be done over the color menu.
Examples of different presets.
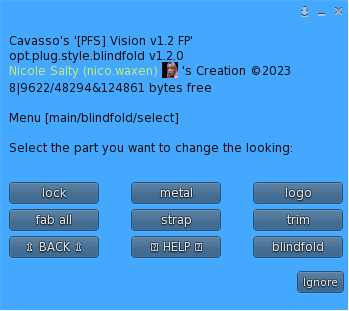
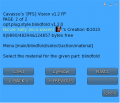
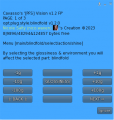
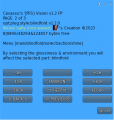
If you want to texture or color a part of the blindfold you can do it by selecting the part you want to alter and than select what do you want to change.
⇫ BACK ⇫ – Move back to the previous menu.
⍰ HELP ⍰ – Streams the help into the chat window.
blindfold, fab all, strap, trim, lock, metal, logo - Select the part to alter.
Select the face(s) according the description to apply a color, a material texture, a glossiness or environment.
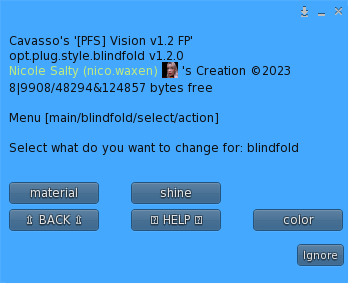
When the part you want to alter is selected another menu will ask you what to do.
⇫ BACK ⇫ – Move back to the previous menu.
color - Sub-menu to change the color.
material - Sub-menu to change the material texture.
shine - Sub-menu to change the shine.
You can change the color, material or shine. Remember the leathers textures include the color and the it is not recommend to recolor them, the final look will not be optimal!.
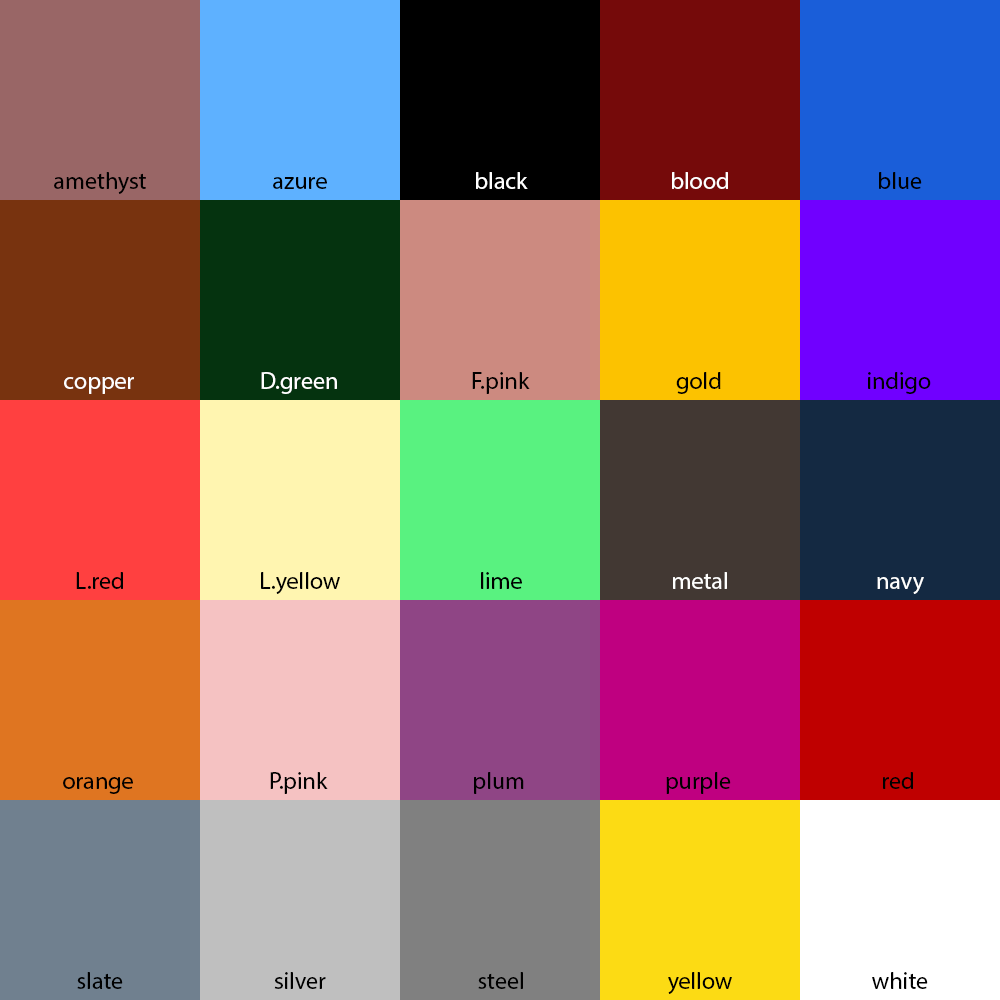
Select the color you want to apply on the selected part, you can also change the custom A & B color to your liking.
⇫ BACK ⇫ – Move back to the previous menu.
⇦ PREVIOUS - Move back to the previous page.
NEXT ⇨ - Move forward to the next page.
⍰ HELP ⍰ – Streams the help into the chat window.
D.green, F.pink, L.red, L,yellow, P.pink, amethyst, azure, black, blood, blue, copper, custom.A, custom.B, gold, indigo,lime, metal, navy, orange, plum, purple, red, silver, slate, steel, white, yellow – Select the color preset for the mask.
RGB.A, RGB.B – Enter the new value for custom.A or custom.B color. Example <123/123/123>
Palette of colors:
⇫ BACK ⇫ – Move back to the previous menu.
⇦ PREVIOUS - Move back to the previous page.
NEXT ⇨ - Move forward to the next page.
L.grey, L.beige, L.white, L.blue, L.brown, L.blue, L.pink, L.red, L.yellow - Select one of the leather material.
Plastic - Select the plastic material.
⇫ BACK ⇫ – Move back to the previous menu.
⇦ PREVIOUS - Move back to the previous page.
NEXT ⇨ - Move forward to the next page.
⍰ HELP ⍰ – Streams the help into the chat window.
-1g – Reduce the glossiness by 1.
-10g – Reduce the glossiness by 10.
-100g – Reduce the glossiness by 100.
+1g – Increase the glossiness by 1.
+10g – Increase the glossiness by 10.
+100g – Increase the glossiness by 100.
-1e – Reduce the environment by 1.
-10e – Reduce the environment by 10.
-100e – Reduce the environment by 100.
+1e – Increase the environment by 1.
+10e – Increase the environment by 10.
+100e – Increase the environment by 100.
The materials textures already include the glossiness and environment values, but you can change the to your liking.
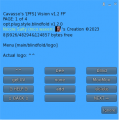
You can select from the list of logos the one you want to be shown on the blindfold face, or none if you don't want to have one.
⇫ BACK ⇫ – Move back to the previous menu.
⇦ PREVIOUS - Move back to the previous page.
NEXT ⇨ - Move forward to the next page.
⍰ HELP ⍰ – Streams the help into the chat window.
add – Add your own logo. You can add your own logo with the format <UUID of the texture>,<unique name>. Name length limited to 8 characters.
delete – Delete the previously added custom logos if they are.
get.UV – Get the UV to make your own logo.
none – no logo is shown on the dedicated face..
<lits_of_logos>... – Select the logo you want to show on the dedicated blindfold face.
List of standard logos:
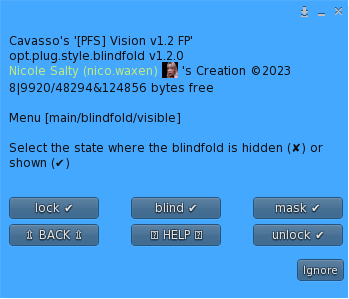
You can select when the blindfold is shown or hidden.
⇫ BACK ⇫ – Move back to the previous menu.
⍰ HELP ⍰ – Streams the help into the chat window.
unlock ✔ – the blindfold is shown when unlocked.
unlock ✘ – the blindfold is hidden when unlocked.
lock ✔ – the blindfold is shown when locked.
lock ✘ – the blindfold is hidden when locked.
blind ✔ – the blindfold is shown when blinded.
blind ✘ – the blindfold is hidden when blinded.
mask ✔ – the blindfold is shown when a mask is applied.
mask ✘ – the blindfold is hidden when no mask is applied.
3. Vision controller HUD
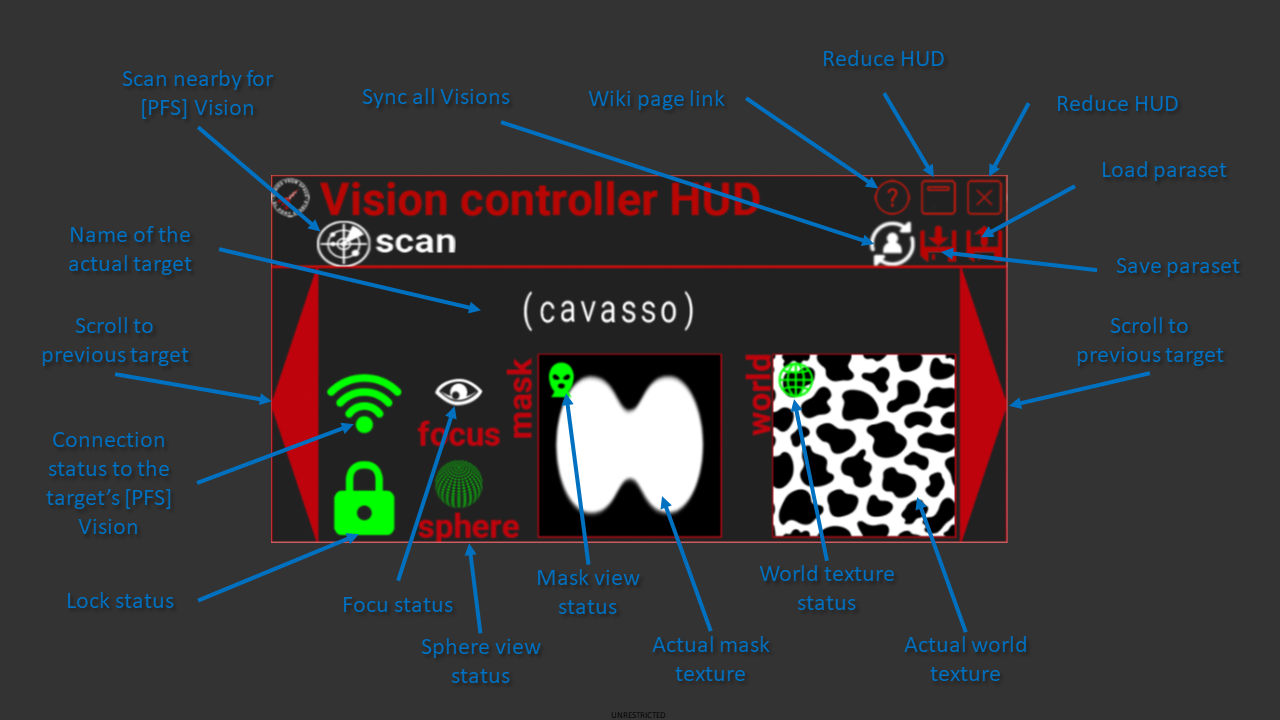
This HUD can:
- Scan all [PFS] Vision users within a region, list the one you are listed as keyholder w/o range limit, others only inside a 20.0m range.
- Adds the [PFS] Vision user where you are listed as keyholder to your control HUD.
- Acess the listed [PFS] Vision users main menu.
- From the HUD you can scroll and get the actual status of the user's [PFS] Vision if present in the same region.
- Get a general status of the actual selected user.
- Access directly to the functions menus.
- Drag & Drop your own mask texture and world texture to apply them on the user side.
- Remove listed [PFS] Vision users from the HUD.
- Sync the user's settings to all other [PFS] Vision users listed on the HUD.
- Save all Vision settings into parasets.
- Load a previously saved paraset and restore the actual settings. I sync is enable than the settings will be shared to all the listed users on the HUD.
3.1 Scan for users
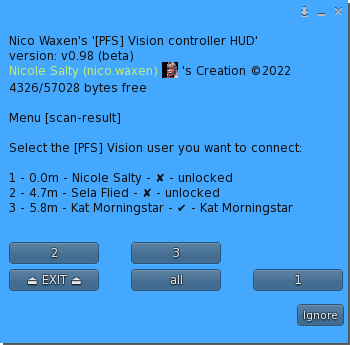
Click the scan button  and after scanning the entire region, if some [PFS] Vision users has been found a menu will be displayed;
This menu lists all users present in the region where you are keyholder and also all locked and all unlocked devices in a range of 20m.
Depending on the device status and who hold the keyholder, you may just access it if you are close enough or add it to the HUD or even add it to the HUD and access the device main menu.
3.2 Remove a listed user
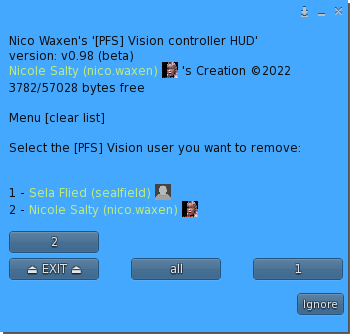
If you have listed users on your HUD and you want to remove some, click the connect button  and a menu to select which one you want to remove will be displayed:
NOTE: unlocked device will be automatically removed from the HUD!
3.3 Drag & Drop textures
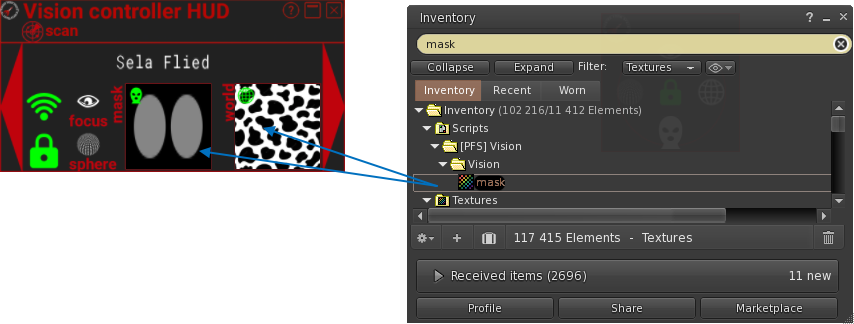
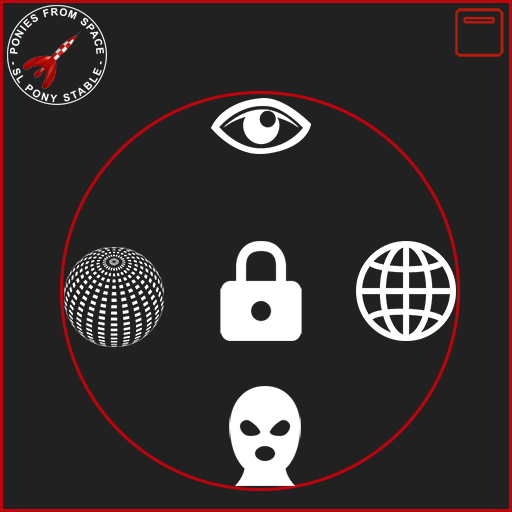
if the user is already in the mask view mode or already having the world textures being overwritten by one from the [PFS] Vision system, you can simply drag and drop any type of texture directly on the HUD and the dropped texture will be applied on the user side.
NOTE: Be carreful where you drop the mask texture and be sure you aim the colored area (the deep black part on the example) and not the transparent area, or you may re-texture something else you didn't wanted!
3.4 Sync
If you have several Vision users listed on your HUD and you want to give everyone the same settings, you may run into a long and hard time to get everyone the same settings. To avoid you to feel frustrated by unflexible tool, you can here sync the selected user's settings to all others with a simple click. Any new listed user will be sync in the same way. In case the actual user that is used as source of the sync vanish, the next one on the list will take the task.
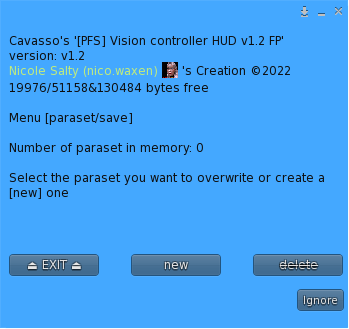
3.5 Save paraset
You can save the actual Vision settings into a paraset, this will help you to restore settings you have previously used. All the settings are saved except the lock states, access mode and owners.
⏏ EXIT ⏏ – Close the actual menu.
new – Create a new paraset and save all the settings.
delete – Delete a previously created paraset.
<list_of_parasets>... – Overwrite an existing paraset with the actual settings.
3.6 Load paraset
You can load a paraset to the actual Vision user and to all others one listed on the HUD if the sync feature is enable. The users must be within the same region to be able to get the settings applied.
4. Options
4.1 Access plugins
WARNING: With version 1.2 you do not need to add anymore access script to your Vision, the new access mode should cover all your needs. In case you still want to make your own access script, you can still make one or more and drag&drop into the content tab. The given plug.access.public script is a public access script for Vision but only here as example, no need to add it to your Vision to give everyon the access to torture you!.
4.2 Status
Wearing a vision control system can be hard to people to figure out the user is severly restricted and can even in some case let people feeling ignored. To avoid any of this you can wear an additional object that will inform the people around the user about the retrictions running. The text is as short as possible to not make it too intrusive. The little dot (⚪) over the is either green for unlocked, either red for locked state. If locked a general restriction word will be added meaning one restriction is at least active there.
4.3 hide/show plugin
DISCLAMER: I decline all responsibility in case your object soesn't work anymore or you cannot get it back to its original form. Backup your objects, make copy or save the contents before any manipulation!
The plugin is able to link the informations & states of your [PFS] Vision to any worn object, the list of possibilities are:
- RLV detach restriction according the [PFS] Vision lock/unlock state.
- set different group of linked prims and faces, called PRIMGROUP.
- affect the alpha value or color of the defined PRIMGROUP throught ACTION.
- ACTION are build from [PFS] Vision lock state (variable nState) or blind state (variable nBlind)
First of all rez your object on the floor and delete anything present in the content winddow, from the root prim and also all linked prims.
With [PFS] Vision you get an option box [PFS] Vision hide/show plugin (REZ me) . Rez it and unpack it into your inventory, you will get:
- the plugin.hide.show script.
- notecard example config.deluxe blindfold for the RR deluxe blindfold.
- notecard example config.hawk for the SnR hawk hood.
- notecard example config.kdc gasmask for the KDC gasmask.
- blank notecard config.blank to start from scratch.
Think how your object should behave and build one or several PRIMGROUP to be able to adjust the faces with the ACTION and get the expected result. A simple blindfold may only need one PRIMGROUP to be shown or hidden and two ACTION: one action to make it show and another ACTION to make it hide. On the other hand a hood will be always shown but maybe you will need one PRIMGROUP for the padlock with two ACTION to make it hide or show and another PRIMGROUP to change the glass tint with up to seven ACTION to get all the levels from the [PFS] Vision blind setting.
4.3.1 PRIMGROUP
PRIMGROUP syntax:
PRIMGROUP1=LINK1,FACE1|LINK2,FACE2...
PRIMGROUP2=LINK3,FACE3|LINK4,FACE4...
PRIMGROUP is composed with the linked prim name and the faces number. LINK name and FACE number can be found by editing your object. To edit your object better rez it on the floor, right click edit, checkbox 'edit linked' with 'move' and arrows you can scroll the linked prims and get the name from the 'Name:' field, with 'select face' and arrows you can scroll the face of the selected linked prim.
FACE is a bitwise addition of the selected faces: face 0=1, face 1=2, face 2=4, face 3=8, face 4=16, face 5=32, face 6=64, face 7=128.
For example the RR deluxe blindfold PRIMGROUP will look like this: PRIMGROUP1=$Le:1/0,255|$Lb:1/0,255|$Lb:1/0,255. $Le:1/0, $Lb:1/0 & $Lb:1/0 are the linked prims (notice some object have several time the same linked prim name, in that case the link number is taken in consideration), and 255 for faces means all faces.
4.3.2 ACTION
ACTION syntax: ACTION1=[trigger],[value],[condition is TRUE or FALSE]|PRIMGROUP|action1:[ALPHA=x.y]|action2:[COLOR=<r,g,b>]|action3:[TEXTYRE=uuid]...
ACTION is build with name (ACTION1, ACTION2, ...) than only one prim group (PRIMGROUP1) and than the command (ALPHA,x.x, COLOR,<R,G,B> or ALPHARANGE=x.x,y.y or TEXTURE,uuid), you can have several command into one action.
Available trigger and associated value:
- nState --> 1=RLV detection, 2=locked, 4=key taken.
- nBlind --> 0=none, 1=0.5m, 2=1m, 4=2m, 8=4m, 16=8m, 32=16m, 64=custom.
To be noted that value is bitwise coded and the action is triggered only on condition change, from FALSE to TRUE or vice versa.
Available action or command:
- ALPHA,x.x --> set the alpha value from 0.0 (transparent) to 1.0 (opaque).
- COLOR,<R,G,B> --> set the color to the given RGB value (from 0 to 255).
- ALPHARANGE=x.x,y.y --> this is reserved to nBlind value 64 (custom blind range), enter the minimum (x.x) and the maximum (y.y) alpha value, the script will calculate the right alpha from the given range and the custom blind range value. if you don't know what to set, enter the alpha value you have set for nBlind = 0 for x.x and the value for nBlind =32 for y.y.
- TEXTURE=uuid --> set the texture to the uuid value. (if you want to apply a blank texture use uuid "5748decc-f629-461c-9a36-a35a221fe21f" and for transparent use uuid "8dcd4a48-2d37-4909-9f78-f7a9eb4ef903")
4.3.3 General settings
- LOCK=TRUE/FALSE --> if TRUE detach restriction will be added for this object when [PFS] Vision is locked.
- STATUS=TRUE/FALSE --> if TRUE the floating status text will be displayed over the head.
- LINE_FEED=x --> In case the status text is too low you can add lines to shift it up.
- FILL_CHAR=$ --> You can define which type of character is used to feel the line, you cannot leave it blank, use blank space as default.
4.3.4 Examples
example for RR deluxe blindfold
[PRIMS GROUPS]
PRIMGROUP1=$Le:1/0,255|$Lb:1/0,255|$Lb:1/0,255
[ACTIONS]
ACTION1=nState,2,TRUE|PRIMGROUP1|ALPHA=1.0>
ACTION2=nState,2,FALSE|PRIMGROUP1|ALPHA=0.0>
[GENERAL SETTINGS]
LOCK=TRUE
STATUS=TRUE
LINE_FEED=7
FILL_CHAR= <--blank space here
example for SnR hawk
[PRIMS GROUPS]
PRIMGROUP1=Hawk Hood v2,1
[ACTIONS]
ACTION1=nBlind,0,TRUE|PRIMGROUP1|ALPHA=0.50|COLOR=<0,0,0>
ACTION2=nBlind,1,TRUE|PRIMGROUP1|ALPHA=0.58
ACTION3=nBlind,2,TRUE|PRIMGROUP1|ALPHA=0.66
ACTION4=nBlind,4,TRUE|PRIMGROUP1|ALPHA=0.74
ACTION5=nBlind,8,TRUE|PRIMGROUP1|ALPHA=0.82
ACTION6=nBlind,16,TRUE|PRIMGROUP1|ALPHA=0.9
ACTION7=nBlind,32,TRUE|PRIMGROUP1|ALPHA=1.0
ACTION8=nBlind,64,TRUE|PRIMGROUP1|ALPHARANGE=0.5,1.0
[GENERAL SETTINGS]
LOCK=TRUE
STATUS=TRUE
LINE_FEED=5
FILL_CHAR= <--blank space here
example for KDC gasmask
[PRIMS GROUPS]
PRIMGROUP1=nochain:body,8
[ACTIONS]
ACTION1=nBlind,0,TRUE|PRIMGROUP1|ALPHA=0.50|COLOR=<0,0,0>|TEXTURE=5748decc-f629-461c-9a36-a35a221fe21f
ACTION1=nBlind,1,TRUE|PRIMGROUP1|ALPHA=0.58|TEXTURE=5748decc-f629-461c-9a36-a35a221fe21f
ACTION2=nBlind,2,TRUE|PRIMGROUP1|ALPHA=0.66|TEXTURE=5748decc-f629-461c-9a36-a35a221fe21f
ACTION3=nBlind,4,TRUE|PRIMGROUP1|ALPHA=0.74|TEXTURE=5748decc-f629-461c-9a36-a35a221fe21f
ACTION4=nBlind,8,TRUE|PRIMGROUP1|ALPHA=0.82|TEXTURE=5748decc-f629-461c-9a36-a35a221fe21f
ACTION5=nBlind,16,TRUE|PRIMGROUP1|ALPHA=0.9|TEXTURE=5748decc-f629-461c-9a36-a35a221fe21f
ACTION6=nBlind,32,TRUE|PRIMGROUP1|ALPHA=0.99|TEXTURE=5748decc-f629-461c-9a36-a35a221fe21f
ACTION7=nBlind,64,TRUE|PRIMGROUP1|ALPHARANGE=0.5,1.0|TEXTURE=5748decc-f629-461c-9a36-a35a221fe21f
[GENERAL SETTINGS]
LOCK=TRUE
STATUS=TRUE
LINE_FEED=5
FILL_CHAR= <--blank space here


![[PFS] Blindfold](/images/0/00/Vision_blindfold.png)













![example of the overhead [PFS] Vision status (the red text)](/images/8/8a/Vision_blindfold_status.png)
