Difference between revisions of "PFS HawkHood"
m |
m |
||
| (38 intermediate revisions by the same user not shown) | |||
| Line 1: | Line 1: | ||
__TOC__ | __TOC__ | ||
| − | + | <gallery mode="slideshow"> | |
| − | <h1><p style="text-align:center; color: #fe5656;font-size: 60px"> [PFS] | + | File:Hawkhood simple.png|example of Hawkhood |
| − | <p>The [PFS] | + | File:Hawkhood plus.png|example of Hawkhood+ |
| − | + | </gallery> | |
| − | + | <h1><p style="text-align:center; color: #fe5656;font-size: 60px"> [PFS] Hawkhood v1.2</p></h1> | |
| − | + | <p>The [PFS] Hawkhood is a rigged bondage hood to restrict listening and view, mostly dedicated to ponyplay, it can be used in many other disciplines, you will be able to:</br> | |
| − | + | * lock/unlock with RLV or RLVa</br> | |
| − | + | * Access mode: private, public, public ask, owner, group or PFS</br> | |
| − | + | * Blind using the sphere view technology to limit the view distance with many options like silhouette avatars past a distance, replace world texture with an unique one, camera distance limited range, hide location, block start IM past a distance and hide names.</br> | |
| − | + | * Deaf with an unique encryption listening algorythm and with some options like encrypt listening past a distance only, distance can be sync with the blind sphere size, encrypt rezzed objects, remove punctuation, restrict get IM, hide names, keyholder exception for encryption, list of words for encryption exception, encrypt OOC, and encrypt emotes.</br> | |
| − | + | * Mask with overlay on screen with RLVa and prim HUD for RLV, view masks following or not the style and color of the hawkhood</br> | |
| − | + | * Environnement with enforced EEP setings</br> | |
| − | + | * use RL/SL timer </br> | |
| − | + | * colorize & texture over menu, accessible by both user and keyholder</br> | |
| − | + | * work with RLV & RLVa, auto switch when locked</br> | |
| − | + | * make and add your own logo with integrated UV</br> | |
| − | + | * add your own mask texture</br> | |
| − | + | * add your own access script (example is provided)</br></p> | |
| − | + | <p> | |
| + | changes in v1.1:</br> | ||
| + | * added PBR materials | ||
| + | * added MajorEdge and Koura heads | ||
| + | * aligned deaf features to the PFS Headphone | ||
| + | * fixed scan owner | ||
| + | * fixed change logo when locked | ||
| + | * fixed blind and camera ranges | ||
| + | * fixed material selection issues | ||
| + | <p> | ||
| + | changes in v1.2:</br> | ||
| + | * updated style menu, only latex textures now | ||
| + | * fixed a 0s blind sphere color cycle time breaks the change of color | ||
| + | * added general info for cycling sphere color | ||
| + | * fixed total deaf doesn't work with distance | ||
| + | * changed receive chat and receive emote to secure command to avoid interaction with collars | ||
| + | * added some overlays for the mask menu | ||
| + | * added a second hood Hawkhood+ with ears, mane and strap to link the ponysuit's binder | ||
| + | * removed glossiness and environment for Legacy textures | ||
| + | * removed Denim texture | ||
| + | * fixed the washed out PBR colors effect | ||
| + | * fixed the rounding error for the given custom colors | ||
| + | * fixed the group access w/o group active | ||
| + | * added RLV force group | ||
| + | * added banned & allowed users | ||
| + | * added remove PBR from selected surface to increase color compatibility with legacy stuff | ||
| + | * modified color settings, you can now select to use linear RGB or sRGB | ||
| + | </br> | ||
| + | </br> | ||
| + | </br> | ||
| + | [[File:Lelutka-logo.jpeg|frameless|left]]<p></br></br></br></br></br></br></br></br><font size="+2">The hood is rigged for the following Lelutka heads: Avalon, Briannon, Ceylon, Fleur, Kaya, Lilly, Nova, Raven, Eon, Logan & Skyler.</font></p> | ||
| + | <p><font size="+2">And other heads: MajorEdge & Koura</p> | ||
| + | </br> | ||
| + | </br> | ||
| + | </br> | ||
| + | </br> | ||
</br> | </br> | ||
<!--=====================================================--> | <!--=====================================================--> | ||
| Line 26: | Line 61: | ||
<p> | <p> | ||
<p>This bondage gear is the result of the cooperation with Filly Heartsong who did the mesh design. We both put together our long experience in mesh design and scripting to provide you an unique gear. Because we care we are open to listen all your comments and suggestions, as long it will help to get a better product!</p> | <p>This bondage gear is the result of the cooperation with Filly Heartsong who did the mesh design. We both put together our long experience in mesh design and scripting to provide you an unique gear. Because we care we are open to listen all your comments and suggestions, as long it will help to get a better product!</p> | ||
| + | <br><hr><br> | ||
| + | <!--=====================================================--> | ||
| + | <!--1.1 RLV --> | ||
| + | <!--=====================================================--> | ||
| + | <h2><p style="text-align:center; color: #fe5656;font-size: 40px">1.1 RLV</p></h2> | ||
| + | <p>As a viewer standard, RLV restrictions are filtered to the object UUID and if your object uses same restrictions for several functions, you may run into trouble and the result may look a way different than expected. That's why RLV, here, is managed to the script level. You can have several scripts triggering restrictions w/o any interactions between them. You can easily follows the object restrictions table from the RLV menu.</br>Both RLV and RLVa are supported here but for some special features like screen overlay an addition attachement is required for RLV users. Even if most of us uses RLVa viewers today we still need to make things compatible to previous standards.</p> | ||
| + | <br><hr><br> | ||
| + | <!--=====================================================--> | ||
| + | <!--1.2 Access --> | ||
| + | <!--=====================================================--> | ||
| + | <h2><p style="text-align:center; color: #fe5656;font-size: 40px">1.2 Access</p></h2> | ||
| + | <p>The menu access is build in an inovative way. As standard, everyone can access the menu, with different access levels. Access levels are:</br> | ||
| + | * public</br> | ||
| + | * keyholder</br> | ||
| + | * selftouch</br> | ||
| + | Depending on the lock state of the object, you may get different access levels (they are cumulable) which allows you to do things or not. The not allowed functions are strikethrough but the positive side is you can still read every parameter and setting, including the user.</br> | ||
| + | The menu is mono user but the keyholder has always the priority to access it.</br> | ||
| + | You can access it using the command line over channel 7, just hit /7##hood to get access to the main menu of the object. Replace ## with the user 2 first letters of the user name.</br> | ||
| + | The use of the API allows you to override the actual keyholder, this will help you to implement your own access list from wherever you want. You can implement "key grabbing" scripts as much you want they are asked one after the other. For more info look at the included public access script "plug.access.public".</br> | ||
| + | <br><hr><br> | ||
| + | <!--=====================================================--> | ||
| + | <!--1.3 Configurable --> | ||
| + | <!--=====================================================--> | ||
| + | <h2><p style="text-align:center; color: #fe5656;font-size: 40px">1.3 Configurable</p></h2> | ||
| + | <p>The object includes notecards to configure it, you can modify them at your own risk:</br> | ||
| + | * config: general configuration of the object, you can chnage the color palette..</br> | ||
| + | * logo: list of textures for the logo.</br> | ||
| + | * maskenv: list of extra masks textures (if you want to add some more) and list of the EEP environment presets.</br> | ||
| + | * words: list of words that can be added as exception to the encrypting listening..</br> | ||
| + | * worldtexture: list of textures to replace the world texture.</br> | ||
| + | <br><hr><br> | ||
| + | <!--=====================================================--> | ||
| + | <!--1.4 API --> | ||
| + | <!--=====================================================--> | ||
| + | <h2><p style="text-align:center; color: #fe5656;font-size: 40px">1.4 API</p></h2> | ||
| + | <p>Objects you cannot mod are no fun, that's why you will find here an integrated API that will allows you make your own key grabbing script. plug.access.public is a script, full mod and documented, to make your own.</br> | ||
| + | <br><hr><br> | ||
| + | <!--=====================================================--> | ||
| + | <!--1.5 Integrated help --> | ||
| + | <!--=====================================================--> | ||
| + | <h2><p style="text-align:center; color: #fe5656;font-size: 40px">1.5 Integrated help</p></h2> | ||
| + | <p>To make it accessible and easy to use, the object menus have a "help" feature to stream in your chat window some general informations regarding the actual menu displayed to help you to understand what does every buttons.</br> | ||
| + | <br><hr><br> | ||
| + | <!--=====================================================--> | ||
| + | <!--1.6 Truekey --> | ||
| + | <!--=====================================================--> | ||
| + | <h2><p style="text-align:center; color: #fe5656;font-size: 40px">1.6 Truekey</p></h2> | ||
| + | <p>The only way to unlock the object is the use of the key held by the keyholder. In case you are stuck or the keyholder not showing back you can, if seted up previously, use the Truekey feature to get unlocked by everyone having the key password. You can access it, set it up and use it fromt he "Tools" menu.</br> | ||
| + | <br><hr><br> | ||
| + | <!--=====================================================--> | ||
| + | <!--2. Hawkh hood features --> | ||
| + | <!--=====================================================--> | ||
| + | <h1><p style="text-align:center; color: #fe5656;font-size: 60px">2. Hawkhood features</p></h1> | ||
| + | <!--=====================================================--> | ||
| + | <!--2.1 Main menu --> | ||
| + | <!--=====================================================--> | ||
| + | <h2><p style="text-align:center; color: #fe5656;font-size: 40px">2.1 Main menu</p></h2> | ||
| + | <p>The main menu provides you an access to all the functions. You can access it if you touch me or use the command line in the range of 5m. Command line is on channel 7 and is built with the 2 first letters of the username followed by the type of the gear: hood here... Example for 'nikki resident' hawkhood you will type <span style="color: #ffdd33">/7nihood</span> (you will be noticed if the user has a customized prefix). You can also replace the prefix with '*' to get all users menus. Keyholder are not concerned by the distance limit but take in account the talk range limit.</p> | ||
| + | <gallery mode="slideshow"> | ||
| + | Image:Hawkhood main1.png | ||
| + | Image:Hawkhood main2.png | ||
| + | </gallery> | ||
| + | |||
| + | <p><span style="color: #00ff00">❓ HELP ❓</span> – Streams the help into the chat window.<br> | ||
| + | <span style="color: #00ff00">⏏ EXIT ⏏</span> – Close the actual menu and release the menu access to anyone. If not, the access menu will timeout after 300s of no use. Keyholder always have the priority to access the menu even if used by someone else. The actual menu user will be noticed for any attempt to access the menu (fail or success).<br> | ||
| + | <span style="color: #00ff00">lock 🔓</span> – This object is not locked, no RLV restrictions are applied.<br> | ||
| + | <span style="color: #00ff00">unlock 🔒</span> – This object is locked, you cannot remove it and RLV restrictions are applied.<br> | ||
| + | <span style="color: #00ff00">key 🚫</span> – The key is not present and has been taken by someone.<br> | ||
| + | <span style="color: #00ff00">key 🔑</span> – The key is present, anyone can grab it.<br> | ||
| + | <span style="color: #00ff00">access</span> – Sub-menu for the access settings.<br> | ||
| + | <span style="color: #00ff00">RLV</span> – Sub-menu for RLV restrictions if they are.<br> | ||
| + | <span style="color: #00ff00">timer ❌/✅</span> – Sub-menu for timelock (❌=no timer in use, ✅=timer in use).<br> | ||
| + | <span style="color: #00ff00">tools</span> – Sub-menu for the Truekey and some settings.<br> | ||
| + | <span style="color: #00ff00">blind ❌/✅</span> - Sub-menu for the blind function.<br> | ||
| + | <span style="color: #00ff00">deaf ❌/✅</span> - Sub-menu for the deaf function.<br> | ||
| + | <span style="color: #ffdd33">(only Hawkhood+) </span><span style="color: #00ff00">neck ❌/✅</span> - Sub-menu for the stiff neck function.<br> | ||
| + | <span style="color: #00ff00">view ❌/✅</span> - Sub-menu for the view function.<br> | ||
| + | <span style="color: #00ff00">vision ❌/✅</span> - Sub-menu for the vision function.<br> | ||
| + | <span style="color: #00ff00">style</span> - Sub-menu for the style of the hood.<br></p> | ||
| + | <br><hr> | ||
| + | <!--=====================================================--> | ||
| + | <!--2.1.1 Unlock menu --> | ||
| + | <!--=====================================================--> | ||
| + | <h3><p style="text-align:center; color: #fe5656;font-size: 40px">2.1.1 Unlock menu</p></h3> | ||
| + | <p>When unlocking you get some options, you can either call the default settings back to put the hood to its initial state, or keep the settings as they are so the hood will take the last use settings</p> | ||
| + | [[File:Hawkhood unlock menu2.png|center]]<br> | ||
| + | <span style="color: #00ff00">YES</span> – All the settings except style are reseted to there default values.<br> | ||
| + | <span style="color: #00ff00">NO</span> – All the settings are left as they are, at the next lock all restrictions will be applied again.<br> | ||
| + | <span style="color: #00ff00">MENU</span> – Get the main menu back.<br> | ||
| + | <p><span style="color: #ffdd33">NOTE:</span> timeout for this menu is shorter than the standard 300s, only 10s!.</p> | ||
| + | <br><hr> | ||
| + | <!--=====================================================--> | ||
| + | <!--2.2 Access menu --> | ||
| + | <!--=====================================================--> | ||
| + | <h2><p style="text-align:center; color: #fe5656;font-size: 40px">2.2 Access menu</p></h2> | ||
| + | [[File:Hawkhood access.png|center]]<br> | ||
| + | <p><span style="color: #00ff00">❓ HELP ❓</span> – Streams the help into the chat window.<br> | ||
| + | <span style="color: #00ff00">❌ BACK ❌</span> – Move back to the previous menu.<br> | ||
| + | <span style="color: #00ff00">⏏ EXIT ⏏</span> – Close the actual menu and release the menu access to anyone.<br> | ||
| + | <span style="color: #00ff00">private ✅</span> – Only user and owner can access it.<br> | ||
| + | <span style="color: #00ff00">public ✅</span> – Anyone can access the menu and grab the key.<br> | ||
| + | <span style="color: #00ff00">ask ✅</span> – Same as public but if someone want to grab the key, the actual keyholder (if present in the region) will be asked to allow it or not.<br> | ||
| + | <span style="color: #00ff00">group ✅</span> – only same group then user can access it.<br> | ||
| + | <span style="color: #00ff00">PFS ✅</span> – PFS staff can grab the key.<br> | ||
| + | <span style="color: #00ff00">owner</span> – Sub-menu to add/delete owners.<br> | ||
| + | <span style="color: #00ff00">banned</span> – Sub-menu to ban user.<br> | ||
| + | <span style="color: #00ff00">allowed</span> – Sub-menu to allow user.<br> | ||
| + | <p><span style="color: #ffdd33">NOTE:</span> if private, public, ask and group are ❌, anyone can access the menu, you can grab the key if available but if the key is already taken you can still go into all menus but all the buttons will be strikethrough.</p><br> | ||
| + | <p>Exemple of strikethrough menu where the menu user has the <span style="color: #00ff00">free</span> access level</p> | ||
| + | [[File:Ponysuit menu exemple strikethrough.png|center]]<br> | ||
| + | <br><hr> | ||
| + | <!--=====================================================--> | ||
| + | <!--2.2.1 Owner sub menu --> | ||
| + | <!--=====================================================--> | ||
| + | <h4><p style="text-align:center; color: #fe5656;font-size: 30px">2.2.1 Owner sub menu</p></h4> | ||
| + | <p>You can add by scan or UUID one primary owner and two scondary owners. Primary Owner can add or remove secondary owners too.</p> | ||
| + | [[File:Hawkhood owner.png|center]]<br> | ||
| + | <p><span style="color: #00ff00">❓ HELP ❓</span> – Streams the help into the chat window.<br> | ||
| + | <span style="color: #00ff00">❌ BACK ❌</span> – Move back to the previous menu.<br> | ||
| + | <span style="color: #00ff00">⏏ EXIT ⏏</span> – Close the actual menu and release the menu access to anyone.<br> | ||
| + | <span style="color: #00ff00">prim+</span> – Add primary owner (only user can do it).<br> | ||
| + | <span style="color: #00ff00">sec+</span> – Add secondary owner, only primary can add secondary owners (2 max).<br> | ||
| + | <span style="color: #00ff00">remove</span> – Primary owner can remove secondary owners or itself if unlocked.<br><p> | ||
| + | <br><hr><br> | ||
| + | <!--=====================================================--> | ||
| + | <!--2.2.2 Banned sub menu --> | ||
| + | <!--=====================================================--> | ||
| + | <h4><p style="text-align:center; color: #fe5656;font-size: 30px">2.2.2 Banned sub menu</p></h4> | ||
| + | <p>You can add by scan or UUID banned persons to access your gear. This menu is always available to the user when locked or not.</p> | ||
| + | [[File:Hawkhood banned.png|center]]<br> | ||
| + | <p><span style="color: #00ff00">❓ HELP ❓</span> – Streams the help into the chat window.<br> | ||
| + | <span style="color: #00ff00">❌ BACK ❌</span> – Move back to the previous menu.<br> | ||
| + | <span style="color: #00ff00">⏏ EXIT ⏏</span> – Close the actual menu and release the menu access to anyone.<br> | ||
| + | <span style="color: #00ff00">ban+</span> – Add someone by entering the UUID or by scan to the banned list.<br> | ||
| + | <span style="color: #00ff00">ban-</span> – Remove someone from the banned list.<br> | ||
| + | <span style="color: #00ff00">list</span> – Stream the banned list to your chat window.<br><p> | ||
| + | <br><hr><br> | ||
| + | <!--=====================================================--> | ||
| + | <!--2.2.3 Allowed sub menu --> | ||
| + | <!--=====================================================--> | ||
| + | <h4><p style="text-align:center; color: #fe5656;font-size: 30px">2.2.3 Allowed sub menu</p></h4> | ||
| + | <p>You can add by scan or UUID allowed persons to access your gear, this is useful if the access level is set to private and you want to allow only few persons the access. This menu is always available to the user when locked or not.</p> | ||
| + | [[File:Hawkhood allowed.png|center]]<br> | ||
| + | <p><span style="color: #00ff00">❓ HELP ❓</span> – Streams the help into the chat window.<br> | ||
| + | <span style="color: #00ff00">❌ BACK ❌</span> – Move back to the previous menu.<br> | ||
| + | <span style="color: #00ff00">⏏ EXIT ⏏</span> – Close the actual menu and release the menu access to anyone.<br> | ||
| + | <span style="color: #00ff00">allow+</span> – Add someone by entering the UUID or by scan to the allowed list.<br> | ||
| + | <span style="color: #00ff00">allow-</span> – Remove someone from the allowed list.<br> | ||
| + | <span style="color: #00ff00">list</span> – Stream the allowed list to your chat window.<br><p> | ||
| + | <br><hr><br> | ||
| + | <!--=====================================================--> | ||
| + | <!--2.3 Tools menu --> | ||
| + | <!--=====================================================--> | ||
| + | <h2><p style="text-align:center; color: #fe5656;font-size: 40px">2.3 Tools menu</p></h2> | ||
| + | [[File:Hawkhood tools.png|center]]<br> | ||
| + | <p><span style="color: #00ff00">❓ HELP ❓</span> – Streams the help into the chat window.<br> | ||
| + | <span style="color: #00ff00">❌ BACK ❌</span> – Move back to the previous menu.<br> | ||
| + | <span style="color: #00ff00">⏏ EXIT ⏏</span> – Close the actual menu and release the menu access to anyone.<br> | ||
| + | <span style="color: #00ff00">Truekey</span> – Only the wearer can get a new Truekey. The key can get given away, but the final user will need to know the password.<br> | ||
| + | <span style="color: #00ff00">set pw</span> – Set a new password number for the Truekey.<br> | ||
| + | <span style="color: #00ff00">use key</span> – When you wear the Truekey with the correct password you can grab this object key. The wearer cannot use the Truekey on its own object!<br> | ||
| + | <span style="color: #00ff00">spam</span> – Access the sub-menu to change the spam setting.<br> | ||
| + | <span style="color: #00ff00">prefix</span> – change your prefix to whatever you want as long it's built with 2 letters.<br> | ||
| + | <span style="color: #00ff00">reset</span> – Reset the linkset data and restart all scripts, default material preset will be applied.<br></p> | ||
| + | <br><hr> | ||
| + | <!--=====================================================--> | ||
| + | <!--2.3.1 Spam menu --> | ||
| + | <!--=====================================================--> | ||
| + | <h4><p style="text-align:center; color: #fe5656;font-size: 30px">2.3.1 Spam menu</p></h4> | ||
| + | <p>You can adjust the level of spam from differents types of message: RLV version, main feature and sub feature. You can either set it to public, private, both or disabled. By definition a sub feature is usually a parameter of a main feature, example: wrists bind into the armbinder is a main feature but fartouch restriction is a sub feature.</p> | ||
| + | [[File:Hawkhood spam.png|center]]<br> | ||
| + | <p><span style="color: #00ff00">❓ HELP ❓</span> – Streams the help into the chat window.<br> | ||
| + | <span style="color: #00ff00">❌ BACK ❌</span> – Move back to the previous menu.<br> | ||
| + | <span style="color: #00ff00">⏏ EXIT ⏏</span> – Close the actual menu and release the menu access to anyone.<br> | ||
| + | <span style="color: #00ff00">RLV ✅</span> - spam the RLV version on the public chat at login/wear/reset, <span style="color: #00ff00">private</span> - only user can read it, ❌ - disabled.<br> | ||
| + | <span style="color: #00ff00">main ✅</span> - spam user and menu user for all main feature, <span style="color: #00ff00">public</span> - only menu user, <span style="color: #00ff00">private</span> - only the user, ❌ - disabled. (note: sub feature spam is following the same setting until the sub setting is changed)<br> | ||
| + | <span style="color: #00ff00">sub ✅</span> - spam user and menu user for all sub feature, <span style="color: #00ff00">public</span> - only menu user, <span style="color: #00ff00">private</span> - only the user, ❌ - disabled.<br></p> | ||
| + | <br><hr> | ||
| + | <!--=====================================================--> | ||
| + | <!--2.4 RLV menu --> | ||
| + | <!--=====================================================--> | ||
| + | <h2><p style="text-align:center; color: #fe5656;font-size: 40px">2.4 RLV menu</p></h2> | ||
| + | <p>Universal scripts must deal with different configurations where sometimes same restrictions can be triggered by two scripts. That’s why here RLV restrictions are managed in a unique way. The goal is to keep things working as they should and especially when restrictions are lifted. All active restrictions are listed with the restriction itself like <span style="color: #ffdd33">sendchat=n</span> and the script which triggered it <span style="color: #ffdd33">from sub.deaf</span>.</p> | ||
| + | [[File:Hawkhood rlv.png|center]]<br> | ||
| + | <p><span style="color: #00ff00">❓ HELP ❓</span> – Streams the help into the chat window.<br> | ||
| + | <span style="color: #00ff00">❌ BACK ❌</span> – Move back to the previous menu.<br> | ||
| + | <span style="color: #00ff00">⏏ EXIT ⏏</span> – Close the actual menu and release the menu access to anyone.<br> | ||
| + | <span style="color: #00ff00">list</span> - Stream in your chat window all the active restrictions with the script name which is the source of the restriction. You may see same restriction for different scripts, this is all normal.<br> | ||
| + | <span style="color: #00ff00">group</span> - Sub-menu for group restriction.<br></p> | ||
| + | <p>Example of streamed out list of active restrictions:</p> | ||
| + | [[File:Hawkhood tools rlv2.png|center]]<br> | ||
| + | <br><hr> | ||
| + | <!--=====================================================--> | ||
| + | <!--2.4.1 Group restriction menu --> | ||
| + | <!--=====================================================--> | ||
| + | <h4><p style="text-align:center; color: #fe5656;font-size: 30px">2.4.1 Group restriction</p></h4> | ||
| + | <p>You can force the user to a specific group and the user must be a member of it.</p> | ||
| + | [[File:Hawkhood group.png|center]]<br> | ||
| + | <p><span style="color: #00ff00">❓ HELP ❓</span> – Streams the help into the chat window.<br> | ||
| + | <span style="color: #00ff00">❌ BACK ❌</span> – Move back to the previous menu.<br> | ||
| + | <span style="color: #00ff00">ALL ✅</span> – Unrestrict all.<br> | ||
| + | <span style="color: #00ff00">All ❌</span> – Restrict all.<br> | ||
| + | <span style="color: #00ff00">group ❌/✅</span> – Group forced or not.<br> | ||
| + | <span style="color: #00ff00">groupID</span> – Set the forced group giving a valid UUID where the user is member of it.<br><p> | ||
| + | <br><hr><br> | ||
| + | <!--=====================================================--> | ||
| + | <!--2.5 Timer menu --> | ||
| + | <!--=====================================================--> | ||
| + | <h2><p style="text-align:center; color: #fe5656;font-size: 40px">2.5 Timer menu</p></h2> | ||
| + | <p><span style="color: #ffdd33">NOTE:</span> When the timer runs out, the key is given back to the user. No one will be able to grab it except if they are some "key grabbing" plugin scripts installed.</p> | ||
| + | <p>The timer can be RL or SL time, you can switch from one to another w/o resetting the time left. Wearer can set a timer and do some self-bondage, once started the timer cannot be stopped except if someone else grab the key and get the keyholder access level.</p> | ||
| + | <gallery mode="slideshow"> | ||
| + | Image:Hawkhood timer1.png | ||
| + | Image:Hawkhood timer2.png | ||
| + | </gallery> | ||
| + | <p><span style="color: #00ff00">❌ BACK ❌</span> – Move back to the previous menu.<br> | ||
| + | <span style="color: #00ff00">⏪</span> - Move back to the previous page.<br> | ||
| + | <span style="color: #00ff00">⏩</span> - Move forward to the next page.<br> | ||
| + | <span style="color: #00ff00">❓ HELP ❓</span> – Streams the help into the chat window.<br> | ||
| + | <span style="color: #00ff00">stop</span> - Stop the actual timer but don't give back the key back to the user.<br> | ||
| + | <span style="color: #00ff00">RLtime ❌</span> – SL time mode.<br> | ||
| + | <span style="color: #00ff00">RLtime ✅</span> – RL time mode.<br> | ||
| + | <span style="color: #00ff00">hide ✅</span> – The actual timer value and any added time triggered by the menu buttons are hided to the wearer.<br> | ||
| + | <span style="color: #00ff00">+2min</span> – Add 2 minutes to the actual timer value.<br> | ||
| + | <span style="color: #00ff00">+5min</span> – Add 5 minutes to the actual timer value.<br> | ||
| + | <span style="color: #00ff00">+30min</span> – Add 30 minutes to the actual timer value.<br> | ||
| + | <span style="color: #00ff00">+1h</span> – Add 1 hour to the actual timer value.<br> | ||
| + | <span style="color: #00ff00">+3h</span> – Add 3 hours to the actual timer value.<br> | ||
| + | <span style="color: #00ff00">+6h</span> – Add 6 hours to the actual timer value.<br> | ||
| + | <span style="color: #00ff00">+12h</span> – Add 12 hours to the actual timer value.<br> | ||
| + | <span style="color: #00ff00">+24h</span> – Add 24 hours to the actual timer value.<br></p> | ||
| + | <br><hr> | ||
| + | <!--=====================================================--> | ||
| + | <!--2.6 Blind menu --> | ||
| + | <!--=====================================================--> | ||
| + | <h2><p style="text-align:center; color: #fe5656;font-size: 40px">2.6 Blind menu</p></h2> | ||
| + | [[File:Hawkhood blind.png|center]]<br> | ||
| + | <p><span style="color: #00ff00">❌ BACK ❌</span> – Move back to the previous menu.<br> | ||
| + | <span style="color: #00ff00">❓ HELP ❓</span> – Streams the help into the chat window.<br> | ||
| + | <span style="color: #00ff00">⏏ EXIT ⏏</span> – Close the actual menu and release the menu access to anyone.<br> | ||
| + | <span style="color: #00ff00">blind ❌/✅</span> – Access the sub-menu to change the blind settings. ‘❌’ no blind setting active, ‘✅’ at least one blind setting is active.<br> | ||
| + | <span style="color: #00ff00">avatar ✅</span> – Turn all the avatars to silhouettes beyond a certain distance. If ‘blind’ is ‘✅’ the distance is set to the sphere distance, if ‘blind’ is ‘❌’ a menu will ask you the distance you want to set.<br></p> | ||
| + | <p style="color: #ffdd33">NOTE: Depends of the viewer but the avatar either vanish completly from the view or it is turned into single color blob shape</p> | ||
| + | [[File:PFS vision hud blind avatar picture menu.png|frame|center|example of the avatars turned into silhouettes with Catznip R13.2]] | ||
| + | <p><span style="color: #00ff00">world ❌/✅</span> – Access the sub-menu to change the in-world texture. ‘❌’ no world setting active, ‘✅’ the user’s world is textured.<br> | ||
| + | <span style="color: #00ff00">camera ✅</span> – Prevent moving the camera too far from the avatar. If ‘blind’ is ‘✅’ the distance is set to the sphere distance, if ‘blind’ is ‘❌’ a menu will ask you the distance you want to set.<br> | ||
| + | <span style="color: #00ff00">loc ✅</span> – The user is unable to know where they are: the world map is hidden, the parcel and region name on the top menubar are hidden, they cannot create landmarks, nor buy land, nor see what land they have left after teleport, nor see the location in the About box, and even system and object messages are ofuscated if they contain the name of the region and/or the name of the parcel. In addition the user is unable to view the mini map and world map.<br> | ||
| + | <span style="color: #00ff00">strtIM ✅</span> – User can only start IM sessions with people that are within a certain distance. If ‘blind’ is ‘✅’ the distance is set to the sphere distance, if ‘blind’ is ‘❌’ a menu will ask you the distance you want to set. RLV doesn’t support the distance modifier.<br> | ||
| + | <span style="color: #00ff00">names ✅</span> – Unable to see name and they are replaced by dummies, tooltips are hidden and pie menu is almost useless so user can't get the profile, etc... nametags are not displayed anymore, nearby window is useless.<br> | ||
| + | <span style="color: #00ff00">clear ✅</span> – Reset all blind settings back to default values. ✅ means the settings are on default values.<br></p> | ||
| + | <br><hr><br> | ||
| + | <!--=====================================================--> | ||
| + | <!--2.6.1 Blind sub menu --> | ||
| + | <!--=====================================================--> | ||
| + | <h3><p style="text-align:center; color: #fe5656;font-size: 30px">2.6.1 Blind sub menu</p></h3> | ||
| + | [[File:Hawkhood blind blind.png|center]]<br> | ||
| + | <p><span style="color: #00ff00">❌ BACK ❌</span> – Move back to the previous menu.<br> | ||
| + | <span style="color: #00ff00">❓ HELP ❓</span> – Streams the help into the chat window.<br> | ||
| + | <span style="color: #00ff00">⏏ EXIT ⏏</span> – Close the actual menu and release the menu access to anyone.<br> | ||
| + | <span style="color: #00ff00">none ✅</span> – Blind level to none, defaults values for mode, color and opacity are set.<br> | ||
| + | <span style="color: #00ff00">level ❌</span> – no sphere view <span style="color: #00ff00">▁</span> - 16m <span style="color: #00ff00">▂</span> - 8m <span style="color: #00ff00">▃</span> - 4m <span style="color: #00ff00">▆</span> – 2m <span style="color: #00ff00">▇</span> - 1m <span style="color: #00ff00">▉</span> - 0.5m. You can only level up, to remove the actual sphere view, one has to step up all levels until coming back to the start or hit 'none' button.<br> | ||
| + | <span style="color: #00ff00">range ✅</span> – A customized sphere size has been set. Value between 0.0m and 255.0m, under 0.3m you can consider being fully blind.<br> | ||
| + | <span style="color: #00ff00">pixel ✅</span> – The colored sphere is replaced by a pixelisation effect depending on the 'blind" setting (only RLVa).<br> | ||
| + | <span style="color: #00ff00">color</span> – Sub-menu to change the sphere color.<br></p> | ||
| + | <br> | ||
| + | <gallery mode="slideshow"> | ||
| + | File:PFS vision hud blind picture menu.png|example of sphere view at medium level | ||
| + | File:PFS vision hud blind pixel picture menu.png|example of the pixel mode at medium level | ||
| + | </gallery> | ||
| + | <br><hr><br> | ||
| + | <!--=====================================================--> | ||
| + | <!--2.6.1.1 Color sub menu --> | ||
| + | <!--=====================================================--> | ||
| + | <h4><p style="text-align:center; color: #fe5656;font-size: 30px">2.6.1.1 Color sub menu</p></h4> | ||
| + | <p>You can change the sphere color to adjust it to your liking, in addition you can also make the color cycling.</p> | ||
| + | <gallery mode="slideshow"> | ||
| + | File:Hawkhood blind blind color1.png|page 1/4 | ||
| + | File:Hawkhood blind blind color2.png|page 2/4 | ||
| + | File:Hawkhood blind blind color3.png|page 3/4 | ||
| + | File:Hawkhood blind blind color4.png|page 4/4 | ||
| + | </gallery> | ||
| + | <p><span style="color: #00ff00">❌ BACK ❌</span> – Move back to the previous menu.<br> | ||
| + | <span style="color: #00ff00">⏪</span> - Move back to the previous page.<br> | ||
| + | <span style="color: #00ff00">⏩</span> - Move forward to the next page.<br> | ||
| + | <span style="color: #00ff00">❓ HELP ❓</span> – Streams the help into the chat window.<br> | ||
| + | <span style="color: #00ff00">D.green, F.pink, L.red, L,yellow, P.pink, amethyst, azure, black, blood, blue, copper, custom.A, custom.B, gold, indigo,lime, metal, navy, orange, plum, purple, red, silver, slate, steel, white, yellow</span> – Select the color preset for the sphere.<br> | ||
| + | <span style="color: #00ff00">RGB.A, RGB.B</span> – Enter the new value for custom.A or custom.B color. Example <123/123/123><br> | ||
| + | <span style="color: #00ff00">cycle ❌</span> – No color cycling.<br> | ||
| + | <span style="color: #00ff00">cycle ✅</span> – Sphere color is cycling to randoms values. Every defined time a new color is randomly selected and the sphere change to the next value with gradient.<br> | ||
| + | <span style="color: #00ff00">time</span> – Enter a new cycle time for color change.<br></p> | ||
| + | <br> | ||
| + | [[File:PFS vision hud blind red picture menu.png|frame|center|example of the sphere mode colored in red at medium level]] | ||
| + | <br><hr><br> | ||
| + | <!--=====================================================--> | ||
| + | <!--2.6.2 World sub menu --> | ||
| + | <!--=====================================================--> | ||
| + | <h3><p style="text-align:center; color: #fe5656;font-size: 30px">2.6.2 World sub menu</p></h3> | ||
| + | [[File:Hawkhood blind world.png|center]]<br> | ||
| + | <p><span style="color: #00ff00">❌ BACK ❌</span> – Move back to the previous menu.<br> | ||
| + | <span style="color: #00ff00">❓ HELP ❓</span> – Streams the help into the chat window.<br> | ||
| + | <span style="color: #00ff00">add</span> – add a custom world texture to the set, format is texture UUID + name (8 chars max) no space no punctuation.<br> | ||
| + | <span style="color: #00ff00">delete</span> – remove a custom previously added world texture from the set.<br> | ||
| + | <span style="color: #00ff00">none ✅</span> – World texture to none.<br> | ||
| + | <span style="color: #00ff00">std gray, cow spot, wood, stone</span> – set the world texture with the selected texture.<br></p> | ||
| + | <gallery mode="slideshow"> | ||
| + | File:PFS vision hud blind world cow picture.jpg|example of the world textures changed to cow spot | ||
| + | File:PFS vision hud blind world leather picture.png|example of the world textures changed to leather | ||
| + | File:PFS vision hud blind world wood picture.png|example of the world textures changed to wood | ||
| + | File:PFS vision hud blind world stone picture.jpg|example of the world textures changed to stone | ||
| + | File:PFS vision hud blind world gray picture menu.png|example of the standard gray | ||
| + | </gallery> | ||
| + | <br><hr><br> | ||
| + | <!--=====================================================--> | ||
| + | <!--2.7 Deaf menu --> | ||
| + | <!--=====================================================--> | ||
| + | <h2><p style="text-align:center; color: #fe5656;font-size: 40px">2.7 Deaf menu</p></h2> | ||
| + | <gallery mode="slideshow"> | ||
| + | File:Hawkhood deaf.png|page 1/2 | ||
| + | File:Hawkhood deaf2.png|page 2/2 | ||
| + | </gallery> | ||
| + | <p><span style="color: #00ff00">❌ BACK ❌</span> – Move back to the previous menu.<br> | ||
| + | <span style="color: #00ff00">⏪</span> - Move back to the previous page.<br> | ||
| + | <span style="color: #00ff00">⏩</span> - Move forward to the next page.<br> | ||
| + | <span style="color: #00ff00">❓ HELP ❓</span> – Streams the help into the chat window.<br> | ||
| + | <span style="color: #00ff00">⏏ EXIT ⏏</span> – Close the actual menu and release the menu access to anyone.<br> | ||
| + | <span style="color: #00ff00">none ✅</span> – No deaf restrictions are applied, the listening is not encrypted.<br> | ||
| + | <span style="color: #00ff00">level ❌</span> – No listening encryption <span style="color: #00ff00">▁</span> - very light encryption <span style="color: #00ff00">▂</span> - light encryption <span style="color: #00ff00">▃</span> - medium encryption <span style="color: #00ff00">▆</span> – serious encryption <span style="color: #00ff00">▇</span> - harsh encryption <span style="color: #00ff00">▉</span> - total deaf. You can only level up, to remove the actual encryption, one has to step up all levels until coming back to the start or hit 'none' button.<br> | ||
| + | <span style="color: #00ff00">distance</span> – Access the sub-menu to change the encryption distance.<br> | ||
| + | <span style="color: #00ff00">object ✅</span> – Rezzed talking objects are encrypted (following the dustance rule).<br> | ||
| + | <span style="color: #00ff00">punct ✅</span> – Punctuations are removed to any encrypted message <span style="color: #00ff00">(, .!?:-_;*@#()<>/\\\"&+={}[]|%^$`~)</span> including <span style="color: #00ff00">"space"</span><br> | ||
| + | <span style="color: #00ff00">get.IM ✅</span> – Receiving IM are restricted.<br> | ||
| + | <span style="color: #00ff00">name ✅</span> – User is unable to see any name and they are replaced by "dummy" names such as "Someone", "A resident", the tooltips are hidden, the pie menu is almost useless so the user can't get the profile.<br> | ||
| + | <span style="color: #00ff00">keyholder ✅</span> – A keyholder exception is added for encrypted messages, emotes, name and get IM.<br> | ||
| + | <span style="color: #00ff00">list ✅</span> – The included <span style="color: #00ff00">"words"</span> notecard is used as exceptions list for any encrypted message.<br> | ||
| + | <span style="color: #00ff00">OOC ✅</span> – OOC messages are encrypted too.<br> | ||
| + | <span style="color: #00ff00">emote ✅</span> – Emotes are encrypted too, include the rezzed object if <span style="color: #00ff00">object</span> is enabled <span style="color: #00ff00">✅</span><br> | ||
| + | <span style="color: #00ff00">clear ✅</span> – Reset all deaf settings back to default values. <span style="color: #00ff00">✅</span> means the settings are on default values.<br></p> | ||
| + | <p><font color="red" face="sans-serif" size="+1">example for encrypted listening</font></p> | ||
| + | <p style="border-width:3px; border-style:solid; border-color:#FF0000; padding: 1em;"><font face="Courier New"> | ||
| + | <span style="color: #ffdd33">Talking: /me looks at the thing in front of her "I will bind you like a helpless and useless dolly!" evil laugh "then I will roll you into the pit!"</span><br> | ||
| + | DEAF = very light -> <span style="color: #00ff00">Hear: looks at the thing in front of her "i wiᶹl binᶶ you like a helplᶶss and uselesᶷ doᶱᶱy!" evil lᶛugᶷ "then i will rolᶫ yoᶼ into the pit!"</span><br> | ||
| + | DEAF = light -> <span style="color: #00ff00">Hear: looks at the thing in front of her "i will bᵞnd ᶦou liʸe ᶵ helpless and usᵞless dollᶹ!" evᶯl ᶮaᶡgh "then i ᶧill ᶝoll ᶺou iᵅᵋᶵ ᵝhe ᶧit!"</span><br> | ||
| + | DEAF = medium -> <span style="color: #00ff00">Hear: looks at the thing in front of her "i wᵟᶪl ᶹinᶛ ᶦoᵅ ᵋike ᶼ helpˤeᶱs aᶽd useless dolly!" evʱl ʱaᶧᶡh "theᶩ i ᵟᶵll roʱl yᵝᶯ ᶟnto ᶭhe pit!"</span><br> | ||
| + | DEAF = serious -> <span style="color: #00ff00">Hear: looks at the thing in front of her "ᶱ ᵠᶪᶤᶝ ʶiʸd ᶯou liᶬe ᶵ heᶶpless ᶴnᶩ uselᶪss dolᵡy!" ᶸᶿil ᶾaᶧgh "tᶩeᶮ ᶭ wᶵlʷ rʷᶭᶝ ᶱᶨᶟ into ᶮhᵠ ᶬit!"</span><br> | ||
| + | DEAF = harsh -> <span style="color: #00ff00">Hear: looks at the thing in front of her "ᶷ ᶡᶿᶣᶼ ʵᶟʸᵝ ᶼᶴᵝ ᶼˠᶥᶳ ᶳ ᶱᵅᶛᶸᶶᵟᶣᶸ ᵠᵝᶲ ᵋᶸᶣᶨᶤᶧᶡ ᵋᶤᶸᶪᵠ!" ᶛᶟᶬᶬ ᶞᶝᶡᵞᶦ "ᶧᶽᵠᵞ ᵝ ᶧᶽʷᶩ ᶴᶬᶲᶧ ᶬˠᶽ ˠʷᶴᶼ ᵅᶿᶯ ᶺᶽᶳ!"</span><br> | ||
| + | DEAF = total -> <span style="color: #00ff00">Hear: (nothing!)</span><br> | ||
| + | DEAF = harsh + emotes + punct -> <span style="color: #00ff00">Hear: loˠksatᶛᶫethiʵgᶥnfᶥoᶺᵝᵠʵheᶥᶷwᶧˠlbiʸdyouᶸikeaheᶡplesᶾʴˠᶥʴᶺeleᶸsᶫʶlᶾyʱvillᵅughᶦᶸᶞniᶲilᶭʴᵅlᶛᶧoᶫintothepiᶵ</span><br> | ||
| + | DEAF = harsh + emotes + list -> <span style="color: #00ff00">Hear: ᶺᶫʱᶸᶴ ᶷᶮ ᶩᶵᶥ thing ᶪʶ ᶝᵠᶪᵅᶤ ᶣʴ ᵟᶾᵠ "ᵅ ᶪᶷᶥᵅ ʱᶶᶟᶳ ᶩᶼᶿ ʸᶵᶿᵟ ᶩ helpless ᶳᶦᶮ ᶬᶧᶿᶵᶡᶵᶵ ᶲᶱᶶˠᵝ!" ᶭᶫʴᶱ ᶽᶭᶮᶥᶵ "ᶟᶭᶩᶮ ᶸ ᶫᵋᶟᶽ ᶥᶪᶦᶶ ˠᶶᶳ ᶽᶟᶿᶲ ᶭᶥᶧ pit!"</span><br> | ||
| + | </font></p> | ||
| + | <br><hr><br> | ||
| + | <!--=====================================================--> | ||
| + | <!--2.8 Neck menu --> | ||
| + | <!--=====================================================--> | ||
| + | <h2><p style="text-align:center; color: #fe5656;font-size: 40px">2.8 Neck menu</p></h2> | ||
| + | <p><span style="color: #ffdd33">NOTES:</span> This feature is only available on the Hawkhood+ version for Lelutka head!</p> | ||
| + | [[File:Hawkhood neck.png|center]]<br> | ||
| + | <p><span style="color: #00ff00">❌ BACK ❌</span> – Move back to the previous menu.<br> | ||
| + | <span style="color: #00ff00">❓ HELP ❓</span> – Streams the help into the chat window.<br> | ||
| + | <span style="color: #00ff00">⏏ EXIT ⏏</span> – Close the actual menu and release the menu access to anyone.<br> | ||
| + | <span style="color: #00ff00">none ✅</span> – No neck restrictions is applied, the head can move freely.<br> | ||
| + | <span style="color: #00ff00">level ❌</span> – No stiff neck <span style="color: #00ff00">▃</span> - stiff neck soft <span style="color: #00ff00">▅</span> – stiff neck medium <span style="color: #00ff00">▉</span> - stiff neck hard <span style="color: #00ff00">▉</span><br> | ||
| + | <span style="color: #00ff00">strap ✅</span> – Show a strap to connect the Ponysuit's binder.<br> | ||
| + | <p><span style="color: #ffdd33">NOTES:</span><br> - STRAP only works with Ponysuit v2.1 or later!<br> | ||
| + | - Stiff neck always works, with or without Ponysuit!</p> | ||
| + | <gallery mode="slideshow"> | ||
| + | File:Hawkhood neck released.png|example of stiff neck released | ||
| + | File:Hawkhood neck soft.png|example of stiff neck stoft | ||
| + | File:Hawkhood neck medium.png|example of stiff neck medium | ||
| + | File:Hawkhood neck hard.png|example of stiff neck hard | ||
| + | </gallery> | ||
| + | <br><hr><br> | ||
| + | <!--=====================================================--> | ||
| + | <!--2.9 View menu --> | ||
| + | <!--=====================================================--> | ||
| + | <h2><p style="text-align:center; color: #fe5656;font-size: 40px">2.9 View menu</p></h2> | ||
| + | [[File:Hawkhood view.png|center]]<br> | ||
| + | <p><span style="color: #00ff00">❌ BACK ❌</span> – Move back to the previous menu.<br> | ||
| + | <span style="color: #00ff00">❓ HELP ❓</span> – Streams the help into the chat window.<br> | ||
| + | <span style="color: #00ff00">⏏ EXIT ⏏</span> – Close the actual menu and release the menu access to anyone.<br> | ||
| + | <span style="color: #00ff00">mask ❌/✅</span> – Access the sub-menu to change the mask settings. ‘❌’ no mask setting active, ‘✅’ at mask is actually covering the user's display.<br> | ||
| + | <span style="color: #00ff00">env ❌/✅</span> – Access the sub-menu to change the environment settings. ‘❌’ no environment setting active, ‘✅’ at specific environment is actually active.<br> | ||
| + | <span style="color: #00ff00">clear ✅</span> – Reset all mask & environment settings back to default values. '✅' means the settings are on default values.<br> | ||
| + | <br><hr><br> | ||
| + | <!--=====================================================--> | ||
| + | <!--2.9.1 Mask sub menu --> | ||
| + | <!--=====================================================--> | ||
| + | <h3><p style="text-align:center; color: #fe5656;font-size: 30px">2.9.1 Mask sub menu</p></h3> | ||
| + | <gallery mode="slideshow"> | ||
| + | File:hawkhood view mask.png|page 1/3 | ||
| + | File:hawkhood view mask2.png|page 2/3 | ||
| + | File:hawkhood view mask3.png|page 3/3 | ||
| + | </gallery> | ||
| + | <p><span style="color: #00ff00">❌ BACK ❌</span> – Move back to the previous menu.<br> | ||
| + | <span style="color: #00ff00">⏪</span> - Move back to the previous page.<br> | ||
| + | <span style="color: #00ff00">⏩</span> - Move forward to the next page.<br> | ||
| + | <span style="color: #00ff00">❓ HELP ❓</span> – Streams the help into the chat window.<br> | ||
| + | <span style="color: #00ff00">add</span> – Add a custom mask to the list. Format is <texture_uuid>,<name>[,<color_name>]. Name length is limited to 8 letters and must be unique. Color is optional but the name must be one present in the internal memory.<br> | ||
| + | <span style="color: #00ff00">delete</span> – Delete a custom mask from the list if they are.<br> | ||
| + | <span style="color: #00ff00">transparency</span> – Set the transparency value of the mask.<br> | ||
| + | <span style="color: #00ff00">color</span> – Set the color of the mask.<br> | ||
| + | <span style="color: #00ff00">none ✅</span> – Remove the actual mask from the user’s view. ✅ means there is no mask active.<br> | ||
| + | <span style="color: #00ff00">list of masks…</span> – List of available masks. The list is built from the textures present in the ‘maskenv’ notecard, and the one manually added from the menu.<br></p><hr> | ||
| + | <p style="color: #ffdd33">List of the standard masks:<br></p> | ||
| + | <gallery mode="slideshow"> | ||
| + | File:New mask 1Bhole.png|1Bhole (1 big hole) | ||
| + | File:New mask 1Mhole.png|1Mhole (1 medium hole) | ||
| + | File:New mask 1Shole.png|1Shole (1 small hole) | ||
| + | File:New mask 2Bholes.png|2Bholes (2 big holes) | ||
| + | File:New mask 2Mholes.png|2Mholes (2 medium holes) | ||
| + | File:New mask 2Sholes.png|2Sholes (2 small holes) | ||
| + | File:New mask Epinhole.png|Epinhole (Easy pinhole) | ||
| + | File:Hawkhood fullmask.png|FullMask | ||
| + | File:New mask Mpinhole.png|Mpinhole (Medium pinhole) | ||
| + | File:New mask Hpinhole.png|Hpinhole (Harsh pinhole) | ||
| + | File:Hawkhood mask red.png|Auto with a red hoog (color is following the style setup) | ||
| + | File:new mask hawk.png|hawkHood | ||
| + | File:New mask holed.png|holed | ||
| + | </gallery> | ||
| + | <br><hr><br> | ||
| + | <!--=====================================================--> | ||
| + | <!--2.9.1.1 Tranasparency sub menu --> | ||
| + | <!--=====================================================--> | ||
| + | <h4><p style="text-align:center; color: #fe5656;font-size: 30px">2.9.1.1 Tranasparency sub menu</p></h4> | ||
| + | [[File:Hawkhood view mask trans.png|center]]<br> | ||
| + | <p><span style="color: #00ff00">❌ BACK ❌</span> – Move back to the previous menu.<br> | ||
| + | <span style="color: #00ff00">100%</span> – the mask is fully transparent. The touch rules are still opeartive!<br> | ||
| + | <span style="color: #00ff00">-10%</span> – decrease the transparency by 10%.<br> | ||
| + | <span style="color: #00ff00">50%</span> – Set the transparency to 50%.<br> | ||
| + | <span style="color: #00ff00">+10%</span> – increase the transparency by 10%.<br></p> | ||
| + | <br><hr><br> | ||
| + | <!--=====================================================--> | ||
| + | <!--2.9.1.2 Color sub menu --> | ||
| + | <!--=====================================================--> | ||
| + | <h4><p style="text-align:center; color: #fe5656;font-size: 30px">2.9.1.2 Color sub menu</p></h4> | ||
| + | <p>You can change the mask color to adjust it to your liking, in addition you can also make the color cycling.</p> | ||
| + | <gallery mode="slideshow"> | ||
| + | File:Hawkhood view mask color1.png|page 1/4 | ||
| + | File:Hawkhood view mask color2.png|page 2/4 | ||
| + | File:Hawkhood view mask color3.png|page 3/4 | ||
| + | File:Hawkhood view mask color4.png|page 4/4 | ||
| + | </gallery> | ||
| + | <p><span style="color: #00ff00">❌ BACK ❌</span> – Move back to the previous menu.<br> | ||
| + | <span style="color: #00ff00">⏪</span> - Move back to the previous page.<br> | ||
| + | <span style="color: #00ff00">⏩</span> - Move forward to the next page.<br> | ||
| + | <span style="color: #00ff00">❓ HELP ❓</span> – Streams the help into the chat window.<br> | ||
| + | <span style="color: #00ff00">D.green, F.pink, L.red, L,yellow, P.pink, amethyst, azure, black, blood, blue, copper, custom.A, custom.B, gold, indigo,lime, metal, navy, orange, plum, purple, red, silver, slate, steel, white, yellow</span> – Select the color preset for the mask.<br> | ||
| + | <span style="color: #00ff00">RGB.A, RGB.B</span> – Enter the new value for custom.A or custom.B color. Example <123/123/123><br> | ||
| + | <span style="color: #00ff00">cycle ❌</span> – No color cycling.<br> | ||
| + | <span style="color: #00ff00">cycle ✅</span> – Mask color is cycling to randoms values. Every defined time a new color is randomly selected and the mask change to the next value with gradient.<br> | ||
| + | <span style="color: #00ff00">time</span> – Enter a new cycle time for color change.<br></p> | ||
| + | <br><hr><br> | ||
| + | <!--=====================================================--> | ||
| + | <!--2.9.2 Environnement sub menu --> | ||
| + | <!--=====================================================--> | ||
| + | <h3><p style="text-align:center; color: #fe5656;font-size: 30px">2.9.2 Environnement sub menu</p></h3> | ||
| + | <p>The list of available environments presets is variable and build from the <span style="color: #ffdd33">maskenv</span> notecard and those that are manually added from the <span style="color: #ffdd33">add</span> menu.</p> | ||
| + | <gallery mode="slideshow"> | ||
| + | File:Hawkhood view env1.png|page 1/5 | ||
| + | File:Hawkhood view env2.png|page 2/5 | ||
| + | File:Hawkhood view env3.png|page 3/5 | ||
| + | File:Hawkhood view env4.png|page 4/5 | ||
| + | File:Hawkhood view env5.png|page 5/5 | ||
| + | </gallery> | ||
| + | [[File:Warning64.png|frameless|left]] If your <span style="color: #ffdd33">settings</span> folder is not populated with environnement settings, the final result may differ depending on the viewer you are using! Best copy all the sets from your Librairy\Environnements\Skies\ to your Inventory\settings\.<br><br><br><br> | ||
| + | <p><span style="color: #00ff00">❌ BACK ❌</span> – Move back to the previous menu.<br> | ||
| + | <span style="color: #00ff00">⏪</span> - Move back to the previous page.<br> | ||
| + | <span style="color: #00ff00">⏩</span> - Move forward to the next page.<br> | ||
| + | <span style="color: #00ff00">❓ HELP ❓</span> – Streams the help into the chat window.<br> | ||
| + | <span style="color: #00ff00">add</span> - Add a custom environnement setting to the set, format is name (8 chars max) no space no punctuation. In case of EEP be sure the setting is present in the user inventory, see folder 'settings'.<br> | ||
| + | <span style="color: #00ff00">delete</span> - Remove a custom environment setting from the list if they are.<br> | ||
| + | <span style="color: #00ff00">none ✅</span> - No environnement preset active.<br> | ||
| + | <span style="color: #00ff00">default, Neutral, Midnight, Sunrise, A-3AM, A-6AM, A-9AM, Midday, A-3PM, A-6PM, A-9PM, Night,80's Wave, Barcelona, Blizzard, Blue Midday, Bristol, CalWL, Coastal Afternoon, Coastal Sunset, Desert Sunset, Dusty, Fine Day, foggy, Funky Funky Funky, gelatto,Ghost, PaperSnow, Pinkpurple, Pirate, Purple, Purplebluenight, Verdigris, ShadowSet</span> - The user is unable to change the viewer environment settings and is forced to one of the listed. Preset can be EEP settings if the user folders are previously setup.<br> | ||
| + | <br><hr> | ||
| + | <p style="color: #ffdd33">Examples of environment settings.</p> | ||
| + | <gallery mode="slideshow"> | ||
| + | File:HH env default 001.jpg|default | ||
| + | File:HH env neutral 001.png|Neutral | ||
| + | File:HH env midnight 001.png|Midnight | ||
| + | File:HH env sunrise 001.png|Sunrise | ||
| + | File:HH env A3AM 001 001.png|A-3AM | ||
| + | File:HH env A6AM 001 001.png|A-6AM | ||
| + | File:HH env A9AM 001.png|A-9AM | ||
| + | File:HH env midday 001 copie.jpg|Midday | ||
| + | File:HH env A3PM 001 copie.jpg|A-3PM | ||
| + | File:HH env A6PM 001.png|A-6PM | ||
| + | File:HH env A9PM 001.png|A-9PM | ||
| + | File:HH env night 001.png|Night | ||
| + | File:HH env 80swave 001.png|80's Wave | ||
| + | File:HH env Barcelona 001.png|Barcelona | ||
| + | File:HH env blizzard 001.png|Blizzard | ||
| + | File:HH env bluemidday 001.png|Blue Midday | ||
| + | File:HH env bristol 001.png|Bristol | ||
| + | File:HH env calWL 001.png|CalWL | ||
| + | File:HH env coastal after 001.png|Coastal Afternoon | ||
| + | File:HH env coastal suns 001.png|Coastal Sunset | ||
| + | File:HH env coastal sunse 001.png|Desert Sunset | ||
| + | File:HH env coastal dusty 001.png|Dusty | ||
| + | File:HH env coastal fineday 001.png|Fine Day | ||
| + | File:HH env coastal foggy 001.png|foggy | ||
| + | File:HH env coastal funkyfunky 001.png|Funky Funky Funky | ||
| + | File:HH env coastal gelato 001.png|gelatto | ||
| + | File:HH env coastal ghost 001.png|Ghost | ||
| + | File:HH env papersnow 001.png|PaperSnow | ||
| + | File:HH env pinkpurplepng 001.jpg|Pinkpurple | ||
| + | File:HH env pirate 001 001.png|Pirate | ||
| + | File:HH env purple 001.png|Purple | ||
| + | File:HH env purplebluenig 001.png|Purplebluenight | ||
| + | File:HH env verdigris 001.png|Verdigris | ||
| + | File:HH env shadowset 001.png|ShadowSet | ||
| + | </gallery> | ||
| + | <br><hr><br> | ||
| + | <!--=====================================================--> | ||
| + | <!--2.10 Vision menu --> | ||
| + | <!--=====================================================--> | ||
| + | <h2><p style="text-align:center; color: #fe5656;font-size: 40px">2.10 Vision menu</p></h2> | ||
| + | <p>From this menu you can apply some vision restrictions.</p> | ||
| + | [[File:Hawkhood vision.png|center]] | ||
| + | <p><span style="color: #00ff00">⇫ BACK ⇫</span> – Move back to the previous menu.<br> | ||
| + | <span style="color: #00ff00">❓ HELP ❓</span> – Streams the help into the chat window.<br> | ||
| + | <span style="color: #00ff00">⏏ EXIT ⏏</span> – Close the actual menu and release the menu access to anyone.<br> | ||
| + | <span style="color: #00ff00">ML ✅</span> - Mouselook is enabled and the user's camera is forced to the first-view.<br> | ||
| + | <span style="color: #00ff00">lock ✅</span> - prevents the user from unlocking the camera from the avatar, meaning that the user cannot use Alt to focus nor orbit the camera around the avatar. While the camera is locked, the sim forces it to stay in a line of sight from the avatar.<br> | ||
| + | <span style="color: #00ff00">limit ❌/✅</span> - access the sub-menu to change the camera limit. ‘❌’ no camera limit is active, ‘✅’ user has a camera limit restriction.<br> | ||
| + | <span style="color: #00ff00">focus ❌/✅</span> - access the sub-menu to force the camera focus. ‘❌’ no focus is active, ‘✅’ user's caemra is forced to lookat the keyholder, click for options.<br> | ||
| + | <span style="color: #00ff00">clear ✅</span> - Reset all blind settings back to default values. '✅' means the settings are on default values..<br></p> | ||
| + | <br><hr><br> | ||
| + | <!--=====================================================--> | ||
| + | <!--2.10.1 Limit sub menu --> | ||
| + | <!--=====================================================--> | ||
| + | <h3><p style="text-align:center; color: #fe5656;font-size: 30px">2.10.1 Limit sub menu</p></h3> | ||
| + | [[File:Hawkhood vision limit.png|center]] | ||
| + | <p><span style="color: #00ff00">⇫ BACK ⇫</span> – Move back to the previous menu.<br> | ||
| + | <span style="color: #00ff00">❓ HELP ❓</span> – Streams the help into the chat window.<br> | ||
| + | <span style="color: #00ff00">limit ✅</span> - prevents the user from moving the camera outside the defined range from the avatar, either with the mouse wheel or when focusing with the Alt key.<br> | ||
| + | <span style="color: #00ff00">+1m, +2m, +5m, +10m</span> – increase the camera limit range of the selected value, maximum is 96m.<br> | ||
| + | <span style="color: #00ff00">-1m, -2m, -5m, -10m</span> – decrease the camera limit range of the selected value, minimum is 1m.<br> | ||
| + | <span style="color: #00ff00">default</span> – set the camera limit range to the default value of 3m.<br></p> | ||
| + | <br><hr><br> | ||
| + | <!--=====================================================--> | ||
| + | <!--2.10.2 Focus sub menu --> | ||
| + | <!--=====================================================--> | ||
| + | <h3><p style="text-align:center; color: #fe5656;font-size: 30px">2.10.2 Focus sub menu</p></h3> | ||
| + | <gallery mode="slideshow"> | ||
| + | Image:Hawkhood vision focus.png|page 1/2 | ||
| + | Image:Hawkhood vision focus2.png|page 2/2 | ||
| + | </gallery> | ||
| + | <p><span style="color: #00ff00">❌ BACK ❌</span> – Move back to the previous menu.<br> | ||
| + | <span style="color: #00ff00">⏪</span> - Move back to the previous page.<br> | ||
| + | <span style="color: #00ff00">⏩</span> - Move forward to the next page.<br> | ||
| + | <span style="color: #00ff00">focus ✅</span> - If the keyholder is present and inside the defined focus range, the user is forced to turn toward the keyholder and the camera will focus one of the selected <span style="color: #ffdd33">target</span>, the height of the camera can be forced with <span style="color: #ffdd33">myEyes</span>. If the user sit on an object, or the keyholder is off sim, or if the keyholder is outside the focus range, the focus is replaced by camera limit of 3.0m. Be aware that ML is not allowed, if the user decide to roll into ML position an RLV command will be triggered to force to leave ML. In case ML setting is ✅ the user will be toggled from ML to forced camera and vice versa to keep the feeling of the special experience.<br> | ||
| + | <span style="color: #00ff00">+1m, +2m, +5m, +10m</span> - increase the keyholder detection range within the user is forced to focus toward the keyholder, maximum is 96m.<br> | ||
| + | <span style="color: #00ff00">-1m, -2m, -5m, -10m</span> - decrease the keyholder detection range within the user is forced to focus toward the keyholder, minimum is 1m.<br> | ||
| + | <span style="color: #00ff00">default</span> - set the focus range to the default value of 20m.<br> | ||
| + | <span style="color: #00ff00">myEyes ⇧,⇨,⇩</span> - Select the height of the user's camera, where the user is looking from (head, half height, feet) when focus is active.<br> | ||
| + | <span style="color: #00ff00">target ⇧,⇨,⇩</span> - Select the height of the user's camera target, where the user is looking at (head, butt height, feet) when focus is active.<br> | ||
| + | <span style="color: #00ff00">show ✅</span> - If the parcel allows to rez, this function shows inworld the position of the user's camera and where he is looking at. You can use it to adjust the positions of the position where the user is looking from and the position where the user is forced to look at. Disabled if the keyholder vanish or the user sit on an obkect.<br></p> | ||
| + | <br><hr> | ||
| + | <p>Example of the <span style="color: #ffdd33">show</span> feature.</p> | ||
| + | [[File:HG focus show.png|center]]<br> | ||
| + | <p>In the example here, the user is forced to look at the feet of the keyholder. Name with 🎯 is the looking at and name with <span style="color: #ffdd33">👁</span> is the looking from.</p> | ||
| + | <br><hr> | ||
| + | <p style="color: #ffdd33">Examples of different focus positions settings.</p> | ||
| + | <gallery mode="slideshow"> | ||
| + | File:PFS vision hud vision myeye top.png|myEyes to head position and target to head position too | ||
| + | File:PFS vision hud vision myeye middle.png|myEyes to half height position and target to head position too | ||
| + | File:PFS vision hud vision myeye down.png|myEyes to floor position and target to head position too | ||
| + | File:PFS vision hud vision myeye top.png|myEyes to head position and target to head position too | ||
| + | File:PFS vision hud vision target middle.png|myEyes to head position and target to half height position too | ||
| + | File:PFS vision hud vision target down.png|myEyes to head position and target to floor position too | ||
| + | </gallery> | ||
| + | <br><hr><br> | ||
| + | <!--=====================================================--> | ||
| + | <!--2.11 Style menu --> | ||
| + | <!--=====================================================--> | ||
| + | <h2><p style="text-align:center; color: #fe5656;font-size: 40px">2.11 Style menu</p></h2> | ||
| + | <p>Texture & color setup is only done over the style menu by both user and keyholder. The hood can have a denim look or plastic look, for plastic you have different combination of colors and for denim you have only one. You can adjust the color of the different part is you select the one you want to mod.</p> | ||
| + | [[File:Hawkhood style2.png|center]]<br> | ||
| + | <p><span style="color: #00ff00">❌ BACK ❌</span> – Move back to the previous menu.<br> | ||
| + | <span style="color: #00ff00">❓ HELP ❓</span> – Streams the help into the chat window.<br> | ||
| + | <span style="color: #00ff00">⏏ EXIT ⏏</span> – Close the actual menu and release the menu access to anyone.<br> | ||
| + | <span style="color: #00ff00">option</span> - Adjust the hood options.<br> | ||
| + | <span style="color: #00ff00">preset</span> - Select a full preset for the entire hood.<br> | ||
| + | <span style="color: #00ff00">select</span> - Adjust individuals prims to the wished looking.<br> | ||
| + | <span style="color: #00ff00">logo</span> - Select the logo to show on the dedicated face.<br></p> | ||
| + | <br><hr><br> | ||
| + | <!--=====================================================--> | ||
| + | <!--2.11.1 Option sub menu --> | ||
| + | <!--=====================================================--> | ||
| + | <h3><p style="text-align:center; color: #fe5656;font-size: 30px">2.11.1 Option sub menu</p></h3> | ||
| + | [[File:Hawkhood style option.png|center]]<br> | ||
| + | <p><span style="color: #00ff00">❌ BACK ❌</span> – Move back to the previous menu.<br> | ||
| + | <span style="color: #00ff00">❓ HELP ❓</span> – Streams the help into the chat window.<br> | ||
| + | <span style="color: #00ff00">status ✅</span> – The status is shown over the head.<br> | ||
| + | <span style="color: #ffdd33">(only Hawkhood+) </span><span style="color: #00ff00">ears ✅</span> – Hood's ears are shown.<br> | ||
| + | <span style="color: #ffdd33">(only Hawkhood+) </span><span style="color: #00ff00">mane ✅</span> – Hood's mane is shown.<br></p><hr> | ||
| + | <p style="color: #ffdd33">Examples:</p> | ||
| + | |||
| + | <gallery mode="slideshow"> | ||
| + | Image:Hawkhood status.png|status | ||
| + | Image:Hawkhood ears.png|ears <span style="color: #ffdd33">(only Hawkhood+) </span> | ||
| + | Image:Hawkhood mane.png|mane <span style="color: #ffdd33">(only Hawkhood+) </span> | ||
| + | </gallery> | ||
| + | <br><hr><br> | ||
| + | <!--=====================================================--> | ||
| + | <!--2.11.2 Preset sub menu --> | ||
| + | <!--=====================================================--> | ||
| + | <h3><p style="text-align:center; color: #fe5656;font-size: 30px">2.11.2 Preset sub menu</p></h3> | ||
| + | [[File:Hawkhood preset.png|center]]<br> | ||
| + | <p><span style="color: #00ff00">❌ BACK ❌</span> – Move back to the previous menu.<br> | ||
| + | <span style="color: #00ff00">❓ HELP ❓</span> – Streams the help into the chat window.<br> | ||
| + | <span style="color: #00ff00">black, red, white</span> - Select one of the latex preset.<br> | ||
| + | <p style="color: #ffdd33">NOTE: You can still adjust the colors when the preset is adjusted by using the select and color menus.</p> | ||
| + | <br><hr> | ||
| + | <p style="color: #ffdd33">Examples of different presets.</p> | ||
| + | <gallery mode="slideshow"> | ||
| + | File:Hawkhood red.png|red latex | ||
| + | File:Hawkhood black.png|black latex | ||
| + | File:Hawkhood white.png|white latex | ||
| + | </gallery> | ||
| + | <br><hr><br> | ||
| + | <!--=====================================================--> | ||
| + | <!--2.11.3 Select sub menu --> | ||
| + | <!--=====================================================--> | ||
| + | <h3><p style="text-align:center; color: #fe5656;font-size: 30px">2.11.3 Select sub menu</p></h3> | ||
| + | <p>If you want to texture or color a part of the hood, you can do it by selecting the part you want to alter and than select what do you want to change.</p> | ||
| + | [[File:Hawkhood select.png|center]]<br> | ||
| + | <p><span style="color: #00ff00">❌ BACK ❌</span> – Move back to the previous menu.<br> | ||
| + | <span style="color: #00ff00">❓ HELP ❓</span> – Streams the help into the chat window.<br> | ||
| + | <span style="color: #00ff00">trim, fab in, fab out, fab all, logo, ears, mane, strap, metal</span> - Select the part to alter.<br></p> | ||
| + | <br><hr> | ||
| + | <p>When the part you want to alter is selected another menu will ask you what to do.</p> | ||
| + | [[File:Hawkhood action.png|center]]<br> | ||
| + | <p><span style="color: #00ff00">❌ BACK ❌</span> – Move back to the previous menu.<br> | ||
| + | <span style="color: #00ff00">color</span> - Sub-menu to change the color.<br> | ||
| + | <span style="color: #00ff00">material</span> - Sub-menu to change the material texture.<br> | ||
| + | <span style="color: #00ff00">rgb2PBR ✅</span> - Convert the linear RGB to sRGB colorspace for PBR faces.<br> | ||
| + | <span style="color: #00ff00">noPBR</span> - Remove the PBR material from the selected part and switch it back to leagacy.<br></p> | ||
| + | <br><hr><br> | ||
| + | <!--=====================================================--> | ||
| + | <!--2.11.3.1 Color menu --> | ||
| + | <!--=====================================================--> | ||
| + | <h4><p style="text-align:center; color: #fe5656;font-size: 30px">2.11.3.1 Color menu</p></h4> | ||
| + | <p>Select the color you want to apply on the selected part, you can also change the custom A & B color to your liking.</p> | ||
| + | <gallery mode="slideshow"> | ||
| + | Image:Hawkhood action color1.png|page 1/4 | ||
| + | Image:Hawkhood action color2.png|page 2/4 | ||
| + | Image:Hawkhood action color3.png|page 3/4 | ||
| + | Image:Hawkhood action color4.png|page 4/4 | ||
| + | </gallery> | ||
| + | <p><span style="color: #00ff00">❌ BACK ❌</span> – Move back to the previous menu.<br> | ||
| + | <span style="color: #00ff00">⏪</span> - Move back to the previous page.<br> | ||
| + | <span style="color: #00ff00">⏩</span> - Move forward to the next page.<br> | ||
| + | <span style="color: #00ff00">❓ HELP ❓</span> – Streams the help into the chat window.<br> | ||
| + | <span style="color: #00ff00">D.green, F.pink, L.red, L,yellow, P.pink, amethyst, azure, black, blood, blue, copper, custom.A, custom.B, gold, indigo,lime, metal, navy, orange, plum, purple, red, silver, slate, steel, white, yellow</span> – Select the color preset for the mask.<br> | ||
| + | <span style="color: #00ff00">RGB.A, RGB.B</span> – Enter the new value for custom.A or custom.B color. Example <123/123/123><br></p> | ||
| + | <br><hr> | ||
| + | <p style="color: #ffdd33">Palette of colors:</p> | ||
| + | [[File:PFS palette color.png|center]]<br> | ||
| + | <br><hr><br> | ||
| + | <!--=====================================================--> | ||
| + | <!--2.11.3.2 Material menu --> | ||
| + | <!--=====================================================--> | ||
| + | <h4><p style="text-align:center; color: #fe5656;font-size: 30px">2.11.3.2 Material menu</p></h4> | ||
| + | [[File:Hawkhood action material.png|center]] | ||
| + | <p><span style="color: #00ff00">❌ BACK ❌</span> – Move back to the previous menu.<br> | ||
| + | <span style="color: #00ff00">❓ HELP ❓</span> – Streams the help into the chat window.<br> | ||
| + | <span style="color: #00ff00">black, red, white</span> - Select one of the latex material.<br></p> | ||
| + | <br><hr><br> | ||
| + | <!--=====================================================--> | ||
| + | <!--2.11.4 Logo sub menu --> | ||
| + | <!--=====================================================--> | ||
| + | <h3><p style="text-align:center; color: #fe5656;font-size: 30px">2.11.4 Logo sub menu</p></h3> | ||
| + | <p>You can select from the list of logos the one you want to be shown on the hood face, or none if you don't want to have one.</p> | ||
| + | <gallery mode="slideshow"> | ||
| + | Image:Hawkhood action logo1.png|page 1/2 | ||
| + | Image:Hawkhood action logo2.png|page 2/2 | ||
| + | </gallery> | ||
| + | <p><span style="color: #00ff00">❌ BACK ❌</span> – Move back to the previous menu.<br> | ||
| + | <span style="color: #00ff00">⏪</span> - Move back to the previous page.<br> | ||
| + | <span style="color: #00ff00">⏩</span> - Move forward to the next page.<br> | ||
| + | <span style="color: #00ff00">❓ HELP ❓</span> – Streams the help into the chat window.<br> | ||
| + | <span style="color: #00ff00">add</span> – Add your own logo. You can add your own logo with the format <UUID of the texture>,<unique name>. Name length limited to 8 characters.<br> | ||
| + | <span style="color: #00ff00">delete</span> – Delete the previously added custom logos if they are.<br> | ||
| + | <span style="color: #00ff00">get.UV</span> – Get the UV to make your own logo.<br> | ||
| + | <span style="color: #00ff00">none</span> – no logo is shown on the dedicated face..<br> | ||
| + | <span style="color: #00ff00"><lits_of_logos>...</span> – Select the logo you want to show on the dedicated hood face.<br></p> | ||
| + | <br><hr> | ||
| + | <p style="color: #ffdd33">List of standard logos:</p> | ||
| + | <gallery mode="slideshow"> | ||
| + | Image:HH logo doll.png|Doll | ||
| + | Image:HH logo none.png|(none) | ||
| + | Image:HH logo bull.png|Bull | ||
| + | Image:HH logo cow.png|Cow | ||
| + | Image:HH logo mare.png|Mare | ||
| + | Image:HH logo moo.png|Moo | ||
| + | Image:HH logo naughty.png|Naughty | ||
| + | Image:HH logo naughty2.png|Naughty2 | ||
| + | Image:HH logo nawry.png|Nawty | ||
| + | Image:HH logo pony.png|Pony | ||
| + | Image:HH logo slave.png|Slave | ||
| + | Image:HH logo slut.png|Slut | ||
| + | </gallery> | ||
<br><hr><br> | <br><hr><br> | ||
Latest revision as of 06:45, 2 September 2025
Contents
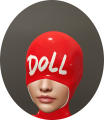
example of Hawkhood
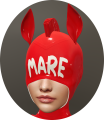
example of Hawkhood+


[PFS] Hawkhood v1.2
The [PFS] Hawkhood is a rigged bondage hood to restrict listening and view, mostly dedicated to ponyplay, it can be used in many other disciplines, you will be able to:
- lock/unlock with RLV or RLVa
- Access mode: private, public, public ask, owner, group or PFS
- Blind using the sphere view technology to limit the view distance with many options like silhouette avatars past a distance, replace world texture with an unique one, camera distance limited range, hide location, block start IM past a distance and hide names.
- Deaf with an unique encryption listening algorythm and with some options like encrypt listening past a distance only, distance can be sync with the blind sphere size, encrypt rezzed objects, remove punctuation, restrict get IM, hide names, keyholder exception for encryption, list of words for encryption exception, encrypt OOC, and encrypt emotes.
- Mask with overlay on screen with RLVa and prim HUD for RLV, view masks following or not the style and color of the hawkhood
- Environnement with enforced EEP setings
- use RL/SL timer
- colorize & texture over menu, accessible by both user and keyholder
- work with RLV & RLVa, auto switch when locked
- make and add your own logo with integrated UV
- add your own mask texture
- add your own access script (example is provided)
changes in v1.1:
- added PBR materials
- added MajorEdge and Koura heads
- aligned deaf features to the PFS Headphone
- fixed scan owner
- fixed change logo when locked
- fixed blind and camera ranges
- fixed material selection issues
changes in v1.2:
- updated style menu, only latex textures now
- fixed a 0s blind sphere color cycle time breaks the change of color
- added general info for cycling sphere color
- fixed total deaf doesn't work with distance
- changed receive chat and receive emote to secure command to avoid interaction with collars
- added some overlays for the mask menu
- added a second hood Hawkhood+ with ears, mane and strap to link the ponysuit's binder
- removed glossiness and environment for Legacy textures
- removed Denim texture
- fixed the washed out PBR colors effect
- fixed the rounding error for the given custom colors
- fixed the group access w/o group active
- added RLV force group
- added banned & allowed users
- added remove PBR from selected surface to increase color compatibility with legacy stuff
- modified color settings, you can now select to use linear RGB or sRGB
The hood is rigged for the following Lelutka heads: Avalon, Briannon, Ceylon, Fleur, Kaya, Lilly, Nova, Raven, Eon, Logan & Skyler.
And other heads: MajorEdge & Koura
1. Generalities
This bondage gear is the result of the cooperation with Filly Heartsong who did the mesh design. We both put together our long experience in mesh design and scripting to provide you an unique gear. Because we care we are open to listen all your comments and suggestions, as long it will help to get a better product!
1.1 RLV
As a viewer standard, RLV restrictions are filtered to the object UUID and if your object uses same restrictions for several functions, you may run into trouble and the result may look a way different than expected. That's why RLV, here, is managed to the script level. You can have several scripts triggering restrictions w/o any interactions between them. You can easily follows the object restrictions table from the RLV menu.
Both RLV and RLVa are supported here but for some special features like screen overlay an addition attachement is required for RLV users. Even if most of us uses RLVa viewers today we still need to make things compatible to previous standards.
1.2 Access
The menu access is build in an inovative way. As standard, everyone can access the menu, with different access levels. Access levels are:
- public
- keyholder
- selftouch
Depending on the lock state of the object, you may get different access levels (they are cumulable) which allows you to do things or not. The not allowed functions are strikethrough but the positive side is you can still read every parameter and setting, including the user.
The menu is mono user but the keyholder has always the priority to access it.
You can access it using the command line over channel 7, just hit /7##hood to get access to the main menu of the object. Replace ## with the user 2 first letters of the user name.
The use of the API allows you to override the actual keyholder, this will help you to implement your own access list from wherever you want. You can implement "key grabbing" scripts as much you want they are asked one after the other. For more info look at the included public access script "plug.access.public".
1.3 Configurable
The object includes notecards to configure it, you can modify them at your own risk:
- config: general configuration of the object, you can chnage the color palette..
- logo: list of textures for the logo.
- maskenv: list of extra masks textures (if you want to add some more) and list of the EEP environment presets.
- words: list of words that can be added as exception to the encrypting listening..
- worldtexture: list of textures to replace the world texture.
1.4 API
Objects you cannot mod are no fun, that's why you will find here an integrated API that will allows you make your own key grabbing script. plug.access.public is a script, full mod and documented, to make your own.
1.5 Integrated help
To make it accessible and easy to use, the object menus have a "help" feature to stream in your chat window some general informations regarding the actual menu displayed to help you to understand what does every buttons.
1.6 Truekey
The only way to unlock the object is the use of the key held by the keyholder. In case you are stuck or the keyholder not showing back you can, if seted up previously, use the Truekey feature to get unlocked by everyone having the key password. You can access it, set it up and use it fromt he "Tools" menu.
2. Hawkhood features
The main menu provides you an access to all the functions. You can access it if you touch me or use the command line in the range of 5m. Command line is on channel 7 and is built with the 2 first letters of the username followed by the type of the gear: hood here... Example for 'nikki resident' hawkhood you will type /7nihood (you will be noticed if the user has a customized prefix). You can also replace the prefix with '*' to get all users menus. Keyholder are not concerned by the distance limit but take in account the talk range limit.


❓ HELP ❓ – Streams the help into the chat window.
⏏ EXIT ⏏ – Close the actual menu and release the menu access to anyone. If not, the access menu will timeout after 300s of no use. Keyholder always have the priority to access the menu even if used by someone else. The actual menu user will be noticed for any attempt to access the menu (fail or success).
lock 🔓 – This object is not locked, no RLV restrictions are applied.
unlock 🔒 – This object is locked, you cannot remove it and RLV restrictions are applied.
key 🚫 – The key is not present and has been taken by someone.
key 🔑 – The key is present, anyone can grab it.
access – Sub-menu for the access settings.
RLV – Sub-menu for RLV restrictions if they are.
timer ❌/✅ – Sub-menu for timelock (❌=no timer in use, ✅=timer in use).
tools – Sub-menu for the Truekey and some settings.
blind ❌/✅ - Sub-menu for the blind function.
deaf ❌/✅ - Sub-menu for the deaf function.
(only Hawkhood+) neck ❌/✅ - Sub-menu for the stiff neck function.
view ❌/✅ - Sub-menu for the view function.
vision ❌/✅ - Sub-menu for the vision function.
style - Sub-menu for the style of the hood.
When unlocking you get some options, you can either call the default settings back to put the hood to its initial state, or keep the settings as they are so the hood will take the last use settings

YES – All the settings except style are reseted to there default values.
NO – All the settings are left as they are, at the next lock all restrictions will be applied again.
MENU – Get the main menu back.
NOTE: timeout for this menu is shorter than the standard 300s, only 10s!.

❓ HELP ❓ – Streams the help into the chat window.
❌ BACK ❌ – Move back to the previous menu.
⏏ EXIT ⏏ – Close the actual menu and release the menu access to anyone.
private ✅ – Only user and owner can access it.
public ✅ – Anyone can access the menu and grab the key.
ask ✅ – Same as public but if someone want to grab the key, the actual keyholder (if present in the region) will be asked to allow it or not.
group ✅ – only same group then user can access it.
PFS ✅ – PFS staff can grab the key.
owner – Sub-menu to add/delete owners.
banned – Sub-menu to ban user.
allowed – Sub-menu to allow user.
NOTE: if private, public, ask and group are ❌, anyone can access the menu, you can grab the key if available but if the key is already taken you can still go into all menus but all the buttons will be strikethrough.
Exemple of strikethrough menu where the menu user has the free access level

You can add by scan or UUID one primary owner and two scondary owners. Primary Owner can add or remove secondary owners too.

❓ HELP ❓ – Streams the help into the chat window.
❌ BACK ❌ – Move back to the previous menu.
⏏ EXIT ⏏ – Close the actual menu and release the menu access to anyone.
prim+ – Add primary owner (only user can do it).
sec+ – Add secondary owner, only primary can add secondary owners (2 max).
remove – Primary owner can remove secondary owners or itself if unlocked.
You can add by scan or UUID banned persons to access your gear. This menu is always available to the user when locked or not.

❓ HELP ❓ – Streams the help into the chat window.
❌ BACK ❌ – Move back to the previous menu.
⏏ EXIT ⏏ – Close the actual menu and release the menu access to anyone.
ban+ – Add someone by entering the UUID or by scan to the banned list.
ban- – Remove someone from the banned list.
list – Stream the banned list to your chat window.
You can add by scan or UUID allowed persons to access your gear, this is useful if the access level is set to private and you want to allow only few persons the access. This menu is always available to the user when locked or not.

❓ HELP ❓ – Streams the help into the chat window.
❌ BACK ❌ – Move back to the previous menu.
⏏ EXIT ⏏ – Close the actual menu and release the menu access to anyone.
allow+ – Add someone by entering the UUID or by scan to the allowed list.
allow- – Remove someone from the allowed list.
list – Stream the allowed list to your chat window.

❓ HELP ❓ – Streams the help into the chat window.
❌ BACK ❌ – Move back to the previous menu.
⏏ EXIT ⏏ – Close the actual menu and release the menu access to anyone.
Truekey – Only the wearer can get a new Truekey. The key can get given away, but the final user will need to know the password.
set pw – Set a new password number for the Truekey.
use key – When you wear the Truekey with the correct password you can grab this object key. The wearer cannot use the Truekey on its own object!
spam – Access the sub-menu to change the spam setting.
prefix – change your prefix to whatever you want as long it's built with 2 letters.
reset – Reset the linkset data and restart all scripts, default material preset will be applied.
You can adjust the level of spam from differents types of message: RLV version, main feature and sub feature. You can either set it to public, private, both or disabled. By definition a sub feature is usually a parameter of a main feature, example: wrists bind into the armbinder is a main feature but fartouch restriction is a sub feature.

❓ HELP ❓ – Streams the help into the chat window.
❌ BACK ❌ – Move back to the previous menu.
⏏ EXIT ⏏ – Close the actual menu and release the menu access to anyone.
RLV ✅ - spam the RLV version on the public chat at login/wear/reset, private - only user can read it, ❌ - disabled.
main ✅ - spam user and menu user for all main feature, public - only menu user, private - only the user, ❌ - disabled. (note: sub feature spam is following the same setting until the sub setting is changed)
sub ✅ - spam user and menu user for all sub feature, public - only menu user, private - only the user, ❌ - disabled.
Universal scripts must deal with different configurations where sometimes same restrictions can be triggered by two scripts. That’s why here RLV restrictions are managed in a unique way. The goal is to keep things working as they should and especially when restrictions are lifted. All active restrictions are listed with the restriction itself like sendchat=n and the script which triggered it from sub.deaf.

❓ HELP ❓ – Streams the help into the chat window.
❌ BACK ❌ – Move back to the previous menu.
⏏ EXIT ⏏ – Close the actual menu and release the menu access to anyone.
list - Stream in your chat window all the active restrictions with the script name which is the source of the restriction. You may see same restriction for different scripts, this is all normal.
group - Sub-menu for group restriction.
Example of streamed out list of active restrictions:

2.4.1 Group restriction
You can force the user to a specific group and the user must be a member of it.

❓ HELP ❓ – Streams the help into the chat window.
❌ BACK ❌ – Move back to the previous menu.
ALL ✅ – Unrestrict all.
All ❌ – Restrict all.
group ❌/✅ – Group forced or not.
groupID – Set the forced group giving a valid UUID where the user is member of it.
NOTE: When the timer runs out, the key is given back to the user. No one will be able to grab it except if they are some "key grabbing" plugin scripts installed.
The timer can be RL or SL time, you can switch from one to another w/o resetting the time left. Wearer can set a timer and do some self-bondage, once started the timer cannot be stopped except if someone else grab the key and get the keyholder access level.


❌ BACK ❌ – Move back to the previous menu.
⏪ - Move back to the previous page.
⏩ - Move forward to the next page.
❓ HELP ❓ – Streams the help into the chat window.
stop - Stop the actual timer but don't give back the key back to the user.
RLtime ❌ – SL time mode.
RLtime ✅ – RL time mode.
hide ✅ – The actual timer value and any added time triggered by the menu buttons are hided to the wearer.
+2min – Add 2 minutes to the actual timer value.
+5min – Add 5 minutes to the actual timer value.
+30min – Add 30 minutes to the actual timer value.
+1h – Add 1 hour to the actual timer value.
+3h – Add 3 hours to the actual timer value.
+6h – Add 6 hours to the actual timer value.
+12h – Add 12 hours to the actual timer value.
+24h – Add 24 hours to the actual timer value.

❌ BACK ❌ – Move back to the previous menu.
❓ HELP ❓ – Streams the help into the chat window.
⏏ EXIT ⏏ – Close the actual menu and release the menu access to anyone.
blind ❌/✅ – Access the sub-menu to change the blind settings. ‘❌’ no blind setting active, ‘✅’ at least one blind setting is active.
avatar ✅ – Turn all the avatars to silhouettes beyond a certain distance. If ‘blind’ is ‘✅’ the distance is set to the sphere distance, if ‘blind’ is ‘❌’ a menu will ask you the distance you want to set.
NOTE: Depends of the viewer but the avatar either vanish completly from the view or it is turned into single color blob shape
world ❌/✅ – Access the sub-menu to change the in-world texture. ‘❌’ no world setting active, ‘✅’ the user’s world is textured.
camera ✅ – Prevent moving the camera too far from the avatar. If ‘blind’ is ‘✅’ the distance is set to the sphere distance, if ‘blind’ is ‘❌’ a menu will ask you the distance you want to set.
loc ✅ – The user is unable to know where they are: the world map is hidden, the parcel and region name on the top menubar are hidden, they cannot create landmarks, nor buy land, nor see what land they have left after teleport, nor see the location in the About box, and even system and object messages are ofuscated if they contain the name of the region and/or the name of the parcel. In addition the user is unable to view the mini map and world map.
strtIM ✅ – User can only start IM sessions with people that are within a certain distance. If ‘blind’ is ‘✅’ the distance is set to the sphere distance, if ‘blind’ is ‘❌’ a menu will ask you the distance you want to set. RLV doesn’t support the distance modifier.
names ✅ – Unable to see name and they are replaced by dummies, tooltips are hidden and pie menu is almost useless so user can't get the profile, etc... nametags are not displayed anymore, nearby window is useless.
clear ✅ – Reset all blind settings back to default values. ✅ means the settings are on default values.

❌ BACK ❌ – Move back to the previous menu.
❓ HELP ❓ – Streams the help into the chat window.
⏏ EXIT ⏏ – Close the actual menu and release the menu access to anyone.
none ✅ – Blind level to none, defaults values for mode, color and opacity are set.
level ❌ – no sphere view ▁ - 16m ▂ - 8m ▃ - 4m ▆ – 2m ▇ - 1m ▉ - 0.5m. You can only level up, to remove the actual sphere view, one has to step up all levels until coming back to the start or hit 'none' button.
range ✅ – A customized sphere size has been set. Value between 0.0m and 255.0m, under 0.3m you can consider being fully blind.
pixel ✅ – The colored sphere is replaced by a pixelisation effect depending on the 'blind" setting (only RLVa).
color – Sub-menu to change the sphere color.
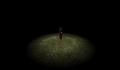
example of sphere view at medium level
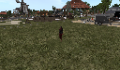
example of the pixel mode at medium level

You can change the sphere color to adjust it to your liking, in addition you can also make the color cycling.

page 1/4

page 2/4

page 3/4
page 4/4


❌ BACK ❌ – Move back to the previous menu.
⏪ - Move back to the previous page.
⏩ - Move forward to the next page.
❓ HELP ❓ – Streams the help into the chat window.
D.green, F.pink, L.red, L,yellow, P.pink, amethyst, azure, black, blood, blue, copper, custom.A, custom.B, gold, indigo,lime, metal, navy, orange, plum, purple, red, silver, slate, steel, white, yellow – Select the color preset for the sphere.
RGB.A, RGB.B – Enter the new value for custom.A or custom.B color. Example <123/123/123>
cycle ❌ – No color cycling.
cycle ✅ – Sphere color is cycling to randoms values. Every defined time a new color is randomly selected and the sphere change to the next value with gradient.
time – Enter a new cycle time for color change.


❌ BACK ❌ – Move back to the previous menu.
❓ HELP ❓ – Streams the help into the chat window.
add – add a custom world texture to the set, format is texture UUID + name (8 chars max) no space no punctuation.
delete – remove a custom previously added world texture from the set.
none ✅ – World texture to none.
std gray, cow spot, wood, stone – set the world texture with the selected texture.
example of the world textures changed to cow spot
example of the world textures changed to leather
example of the world textures changed to wood
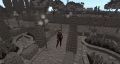
example of the world textures changed to stone
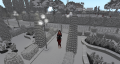
example of the standard gray


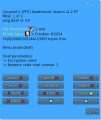
page 1/2
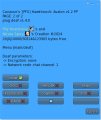
page 2/2


❌ BACK ❌ – Move back to the previous menu.
⏪ - Move back to the previous page.
⏩ - Move forward to the next page.
❓ HELP ❓ – Streams the help into the chat window.
⏏ EXIT ⏏ – Close the actual menu and release the menu access to anyone.
none ✅ – No deaf restrictions are applied, the listening is not encrypted.
level ❌ – No listening encryption ▁ - very light encryption ▂ - light encryption ▃ - medium encryption ▆ – serious encryption ▇ - harsh encryption ▉ - total deaf. You can only level up, to remove the actual encryption, one has to step up all levels until coming back to the start or hit 'none' button.
distance – Access the sub-menu to change the encryption distance.
object ✅ – Rezzed talking objects are encrypted (following the dustance rule).
punct ✅ – Punctuations are removed to any encrypted message (, .!?:-_;*@#()<>/\\\"&+={}[]|%^$`~) including "space"
get.IM ✅ – Receiving IM are restricted.
name ✅ – User is unable to see any name and they are replaced by "dummy" names such as "Someone", "A resident", the tooltips are hidden, the pie menu is almost useless so the user can't get the profile.
keyholder ✅ – A keyholder exception is added for encrypted messages, emotes, name and get IM.
list ✅ – The included "words" notecard is used as exceptions list for any encrypted message.
OOC ✅ – OOC messages are encrypted too.
emote ✅ – Emotes are encrypted too, include the rezzed object if object is enabled ✅
clear ✅ – Reset all deaf settings back to default values. ✅ means the settings are on default values.
example for encrypted listening
Talking: /me looks at the thing in front of her "I will bind you like a helpless and useless dolly!" evil laugh "then I will roll you into the pit!"
DEAF = very light -> Hear: looks at the thing in front of her "i wiᶹl binᶶ you like a helplᶶss and uselesᶷ doᶱᶱy!" evil lᶛugᶷ "then i will rolᶫ yoᶼ into the pit!"
DEAF = light -> Hear: looks at the thing in front of her "i will bᵞnd ᶦou liʸe ᶵ helpless and usᵞless dollᶹ!" evᶯl ᶮaᶡgh "then i ᶧill ᶝoll ᶺou iᵅᵋᶵ ᵝhe ᶧit!"
DEAF = medium -> Hear: looks at the thing in front of her "i wᵟᶪl ᶹinᶛ ᶦoᵅ ᵋike ᶼ helpˤeᶱs aᶽd useless dolly!" evʱl ʱaᶧᶡh "theᶩ i ᵟᶵll roʱl yᵝᶯ ᶟnto ᶭhe pit!"
DEAF = serious -> Hear: looks at the thing in front of her "ᶱ ᵠᶪᶤᶝ ʶiʸd ᶯou liᶬe ᶵ heᶶpless ᶴnᶩ uselᶪss dolᵡy!" ᶸᶿil ᶾaᶧgh "tᶩeᶮ ᶭ wᶵlʷ rʷᶭᶝ ᶱᶨᶟ into ᶮhᵠ ᶬit!"
DEAF = harsh -> Hear: looks at the thing in front of her "ᶷ ᶡᶿᶣᶼ ʵᶟʸᵝ ᶼᶴᵝ ᶼˠᶥᶳ ᶳ ᶱᵅᶛᶸᶶᵟᶣᶸ ᵠᵝᶲ ᵋᶸᶣᶨᶤᶧᶡ ᵋᶤᶸᶪᵠ!" ᶛᶟᶬᶬ ᶞᶝᶡᵞᶦ "ᶧᶽᵠᵞ ᵝ ᶧᶽʷᶩ ᶴᶬᶲᶧ ᶬˠᶽ ˠʷᶴᶼ ᵅᶿᶯ ᶺᶽᶳ!"
DEAF = total -> Hear: (nothing!)
DEAF = harsh + emotes + punct -> Hear: loˠksatᶛᶫethiʵgᶥnfᶥoᶺᵝᵠʵheᶥᶷwᶧˠlbiʸdyouᶸikeaheᶡplesᶾʴˠᶥʴᶺeleᶸsᶫʶlᶾyʱvillᵅughᶦᶸᶞniᶲilᶭʴᵅlᶛᶧoᶫintothepiᶵ
DEAF = harsh + emotes + list -> Hear: ᶺᶫʱᶸᶴ ᶷᶮ ᶩᶵᶥ thing ᶪʶ ᶝᵠᶪᵅᶤ ᶣʴ ᵟᶾᵠ "ᵅ ᶪᶷᶥᵅ ʱᶶᶟᶳ ᶩᶼᶿ ʸᶵᶿᵟ ᶩ helpless ᶳᶦᶮ ᶬᶧᶿᶵᶡᶵᶵ ᶲᶱᶶˠᵝ!" ᶭᶫʴᶱ ᶽᶭᶮᶥᶵ "ᶟᶭᶩᶮ ᶸ ᶫᵋᶟᶽ ᶥᶪᶦᶶ ˠᶶᶳ ᶽᶟᶿᶲ ᶭᶥᶧ pit!"
NOTES: This feature is only available on the Hawkhood+ version for Lelutka head!

❌ BACK ❌ – Move back to the previous menu.
❓ HELP ❓ – Streams the help into the chat window.
⏏ EXIT ⏏ – Close the actual menu and release the menu access to anyone.
none ✅ – No neck restrictions is applied, the head can move freely.
level ❌ – No stiff neck ▃ - stiff neck soft ▅ – stiff neck medium ▉ - stiff neck hard ▉
strap ✅ – Show a strap to connect the Ponysuit's binder.
NOTES:
- STRAP only works with Ponysuit v2.1 or later!
- Stiff neck always works, with or without Ponysuit!
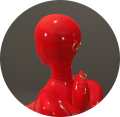
example of stiff neck released
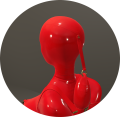
example of stiff neck stoft
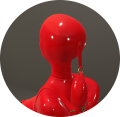
example of stiff neck medium
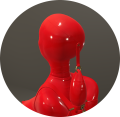
example of stiff neck hard


❌ BACK ❌ – Move back to the previous menu.
❓ HELP ❓ – Streams the help into the chat window.
⏏ EXIT ⏏ – Close the actual menu and release the menu access to anyone.
mask ❌/✅ – Access the sub-menu to change the mask settings. ‘❌’ no mask setting active, ‘✅’ at mask is actually covering the user's display.
env ❌/✅ – Access the sub-menu to change the environment settings. ‘❌’ no environment setting active, ‘✅’ at specific environment is actually active.
clear ✅ – Reset all mask & environment settings back to default values. '✅' means the settings are on default values.
page 1/3

page 2/3
page 3/3


❌ BACK ❌ – Move back to the previous menu.
⏪ - Move back to the previous page.
⏩ - Move forward to the next page.
❓ HELP ❓ – Streams the help into the chat window.
add – Add a custom mask to the list. Format is <texture_uuid>,<name>[,<color_name>]. Name length is limited to 8 letters and must be unique. Color is optional but the name must be one present in the internal memory.
delete – Delete a custom mask from the list if they are.
transparency – Set the transparency value of the mask.
color – Set the color of the mask.
none ✅ – Remove the actual mask from the user’s view. ✅ means there is no mask active.
list of masks… – List of available masks. The list is built from the textures present in the ‘maskenv’ notecard, and the one manually added from the menu.
List of the standard masks:

1Bhole (1 big hole)
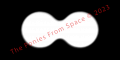
1Mhole (1 medium hole)
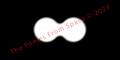
1Shole (1 small hole)

2Bholes (2 big holes)

2Mholes (2 medium holes)

2Sholes (2 small holes)

Epinhole (Easy pinhole)

FullMask

Mpinhole (Medium pinhole)

Hpinhole (Harsh pinhole)

Auto with a red hoog (color is following the style setup)
hawkHood

holed


❌ BACK ❌ – Move back to the previous menu.
100% – the mask is fully transparent. The touch rules are still opeartive!
-10% – decrease the transparency by 10%.
50% – Set the transparency to 50%.
+10% – increase the transparency by 10%.
You can change the mask color to adjust it to your liking, in addition you can also make the color cycling.
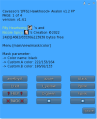
page 1/4

page 2/4

page 3/4
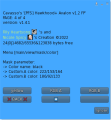
page 4/4


❌ BACK ❌ – Move back to the previous menu.
⏪ - Move back to the previous page.
⏩ - Move forward to the next page.
❓ HELP ❓ – Streams the help into the chat window.
D.green, F.pink, L.red, L,yellow, P.pink, amethyst, azure, black, blood, blue, copper, custom.A, custom.B, gold, indigo,lime, metal, navy, orange, plum, purple, red, silver, slate, steel, white, yellow – Select the color preset for the mask.
RGB.A, RGB.B – Enter the new value for custom.A or custom.B color. Example <123/123/123>
cycle ❌ – No color cycling.
cycle ✅ – Mask color is cycling to randoms values. Every defined time a new color is randomly selected and the mask change to the next value with gradient.
time – Enter a new cycle time for color change.
The list of available environments presets is variable and build from the maskenv notecard and those that are manually added from the add menu.
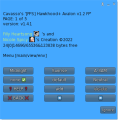
page 1/5

page 2/5
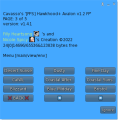
page 3/5

page 4/5
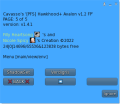
page 5/5


If your settings folder is not populated with environnement settings, the final result may differ depending on the viewer you are using! Best copy all the sets from your Librairy\Environnements\Skies\ to your Inventory\settings\.
❌ BACK ❌ – Move back to the previous menu.
⏪ - Move back to the previous page.
⏩ - Move forward to the next page.
❓ HELP ❓ – Streams the help into the chat window.
add - Add a custom environnement setting to the set, format is name (8 chars max) no space no punctuation. In case of EEP be sure the setting is present in the user inventory, see folder 'settings'.
delete - Remove a custom environment setting from the list if they are.
none ✅ - No environnement preset active.
default, Neutral, Midnight, Sunrise, A-3AM, A-6AM, A-9AM, Midday, A-3PM, A-6PM, A-9PM, Night,80's Wave, Barcelona, Blizzard, Blue Midday, Bristol, CalWL, Coastal Afternoon, Coastal Sunset, Desert Sunset, Dusty, Fine Day, foggy, Funky Funky Funky, gelatto,Ghost, PaperSnow, Pinkpurple, Pirate, Purple, Purplebluenight, Verdigris, ShadowSet - The user is unable to change the viewer environment settings and is forced to one of the listed. Preset can be EEP settings if the user folders are previously setup.
Examples of environment settings.
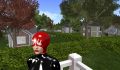
default
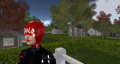
Neutral
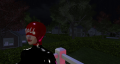
Midnight

Sunrise
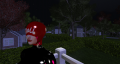
A-3AM
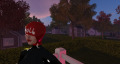
A-6AM
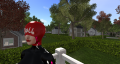
A-9AM
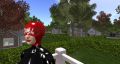
Midday
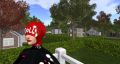
A-3PM
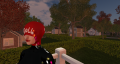
A-6PM
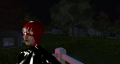
A-9PM
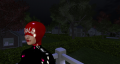
Night
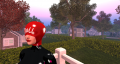
80's Wave

Barcelona
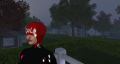
Blizzard
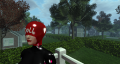
Blue Midday
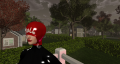
Bristol
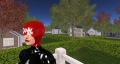
CalWL
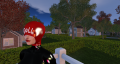
Coastal Afternoon

Coastal Sunset
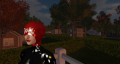
Desert Sunset
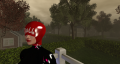
Dusty
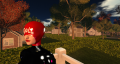
Fine Day
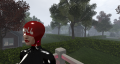
foggy
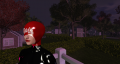
Funky Funky Funky
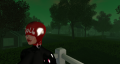
gelatto
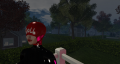
Ghost
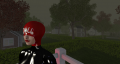
PaperSnow
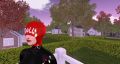
Pinkpurple
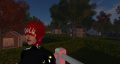
Pirate

Purple
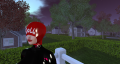
Purplebluenight
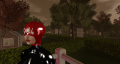
Verdigris
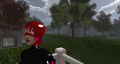
ShadowSet


From this menu you can apply some vision restrictions.

⇫ BACK ⇫ – Move back to the previous menu.
❓ HELP ❓ – Streams the help into the chat window.
⏏ EXIT ⏏ – Close the actual menu and release the menu access to anyone.
ML ✅ - Mouselook is enabled and the user's camera is forced to the first-view.
lock ✅ - prevents the user from unlocking the camera from the avatar, meaning that the user cannot use Alt to focus nor orbit the camera around the avatar. While the camera is locked, the sim forces it to stay in a line of sight from the avatar.
limit ❌/✅ - access the sub-menu to change the camera limit. ‘❌’ no camera limit is active, ‘✅’ user has a camera limit restriction.
focus ❌/✅ - access the sub-menu to force the camera focus. ‘❌’ no focus is active, ‘✅’ user's caemra is forced to lookat the keyholder, click for options.
clear ✅ - Reset all blind settings back to default values. '✅' means the settings are on default values..

⇫ BACK ⇫ – Move back to the previous menu.
❓ HELP ❓ – Streams the help into the chat window.
limit ✅ - prevents the user from moving the camera outside the defined range from the avatar, either with the mouse wheel or when focusing with the Alt key.
+1m, +2m, +5m, +10m – increase the camera limit range of the selected value, maximum is 96m.
-1m, -2m, -5m, -10m – decrease the camera limit range of the selected value, minimum is 1m.
default – set the camera limit range to the default value of 3m.
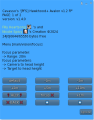
page 1/2
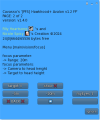
page 2/2


❌ BACK ❌ – Move back to the previous menu.
⏪ - Move back to the previous page.
⏩ - Move forward to the next page.
focus ✅ - If the keyholder is present and inside the defined focus range, the user is forced to turn toward the keyholder and the camera will focus one of the selected target, the height of the camera can be forced with myEyes. If the user sit on an object, or the keyholder is off sim, or if the keyholder is outside the focus range, the focus is replaced by camera limit of 3.0m. Be aware that ML is not allowed, if the user decide to roll into ML position an RLV command will be triggered to force to leave ML. In case ML setting is ✅ the user will be toggled from ML to forced camera and vice versa to keep the feeling of the special experience.
+1m, +2m, +5m, +10m - increase the keyholder detection range within the user is forced to focus toward the keyholder, maximum is 96m.
-1m, -2m, -5m, -10m - decrease the keyholder detection range within the user is forced to focus toward the keyholder, minimum is 1m.
default - set the focus range to the default value of 20m.
myEyes ⇧,⇨,⇩ - Select the height of the user's camera, where the user is looking from (head, half height, feet) when focus is active.
target ⇧,⇨,⇩ - Select the height of the user's camera target, where the user is looking at (head, butt height, feet) when focus is active.
show ✅ - If the parcel allows to rez, this function shows inworld the position of the user's camera and where he is looking at. You can use it to adjust the positions of the position where the user is looking from and the position where the user is forced to look at. Disabled if the keyholder vanish or the user sit on an obkect.
Example of the show feature.

In the example here, the user is forced to look at the feet of the keyholder. Name with 🎯 is the looking at and name with 👁 is the looking from.
Examples of different focus positions settings.
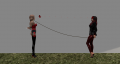
myEyes to head position and target to head position too
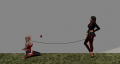
myEyes to half height position and target to head position too

myEyes to floor position and target to head position too
myEyes to head position and target to head position too

myEyes to head position and target to half height position too
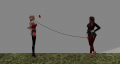
myEyes to head position and target to floor position too


Texture & color setup is only done over the style menu by both user and keyholder. The hood can have a denim look or plastic look, for plastic you have different combination of colors and for denim you have only one. You can adjust the color of the different part is you select the one you want to mod.

❌ BACK ❌ – Move back to the previous menu.
❓ HELP ❓ – Streams the help into the chat window.
⏏ EXIT ⏏ – Close the actual menu and release the menu access to anyone.
option - Adjust the hood options.
preset - Select a full preset for the entire hood.
select - Adjust individuals prims to the wished looking.
logo - Select the logo to show on the dedicated face.

❌ BACK ❌ – Move back to the previous menu.
❓ HELP ❓ – Streams the help into the chat window.
status ✅ – The status is shown over the head.
(only Hawkhood+) ears ✅ – Hood's ears are shown.
(only Hawkhood+) mane ✅ – Hood's mane is shown.
Examples:
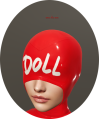
status
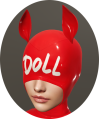
ears (only Hawkhood+)

mane (only Hawkhood+)


❌ BACK ❌ – Move back to the previous menu.
❓ HELP ❓ – Streams the help into the chat window.
black, red, white - Select one of the latex preset.
NOTE: You can still adjust the colors when the preset is adjusted by using the select and color menus.
Examples of different presets.
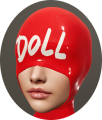
red latex
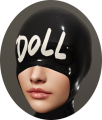
black latex
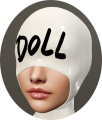
white latex


If you want to texture or color a part of the hood, you can do it by selecting the part you want to alter and than select what do you want to change.

❌ BACK ❌ – Move back to the previous menu.
❓ HELP ❓ – Streams the help into the chat window.
trim, fab in, fab out, fab all, logo, ears, mane, strap, metal - Select the part to alter.
When the part you want to alter is selected another menu will ask you what to do.

❌ BACK ❌ – Move back to the previous menu.
color - Sub-menu to change the color.
material - Sub-menu to change the material texture.
rgb2PBR ✅ - Convert the linear RGB to sRGB colorspace for PBR faces.
noPBR - Remove the PBR material from the selected part and switch it back to leagacy.
Select the color you want to apply on the selected part, you can also change the custom A & B color to your liking.

page 1/4

page 2/4
page 3/4
page 4/4


❌ BACK ❌ – Move back to the previous menu.
⏪ - Move back to the previous page.
⏩ - Move forward to the next page.
❓ HELP ❓ – Streams the help into the chat window.
D.green, F.pink, L.red, L,yellow, P.pink, amethyst, azure, black, blood, blue, copper, custom.A, custom.B, gold, indigo,lime, metal, navy, orange, plum, purple, red, silver, slate, steel, white, yellow – Select the color preset for the mask.
RGB.A, RGB.B – Enter the new value for custom.A or custom.B color. Example <123/123/123>
Palette of colors:


❌ BACK ❌ – Move back to the previous menu.
❓ HELP ❓ – Streams the help into the chat window.
black, red, white - Select one of the latex material.
You can select from the list of logos the one you want to be shown on the hood face, or none if you don't want to have one.
page 1/2
page 2/2
❌ BACK ❌ – Move back to the previous menu.
⏪ - Move back to the previous page.
⏩ - Move forward to the next page.
❓ HELP ❓ – Streams the help into the chat window.
add – Add your own logo. You can add your own logo with the format <UUID of the texture>,<unique name>. Name length limited to 8 characters.
delete – Delete the previously added custom logos if they are.
get.UV – Get the UV to make your own logo.
none – no logo is shown on the dedicated face..
<lits_of_logos>... – Select the logo you want to show on the dedicated hood face.
List of standard logos:
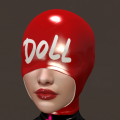
Doll
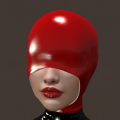
(none)
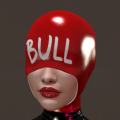
Bull
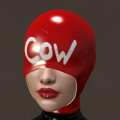
Cow
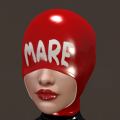
Mare
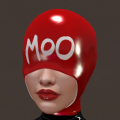
Moo
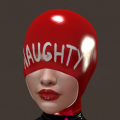
Naughty
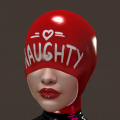
Naughty2
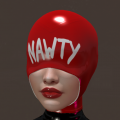
Nawty
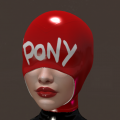
Pony
Slave
Slut